
Hi crafty friends, and welcome back, I guest designer posted up on the Spellbinders blog yesterday (so excited) and wanted to share my Spellbinders Picot Petite by Becca Feeken projects with you. I’m a huge fan of Spellbinder’s products and here are some new ones I know you will enjoy too.
I have three projects today created with the Newly released Picot Petite by Becca Feeken of Amazing Paper Grace. You may also notice me sneaking in a little Glimmer Foiling. It’s my new passion and I can’t help it, I have to add just a bit to each card I design lately.
These are also Christmas Cards #8 and 9 for this year and a beautiful birthday card for a friend.
I have listed the products used under each card and the general products list at the end of the post for you.
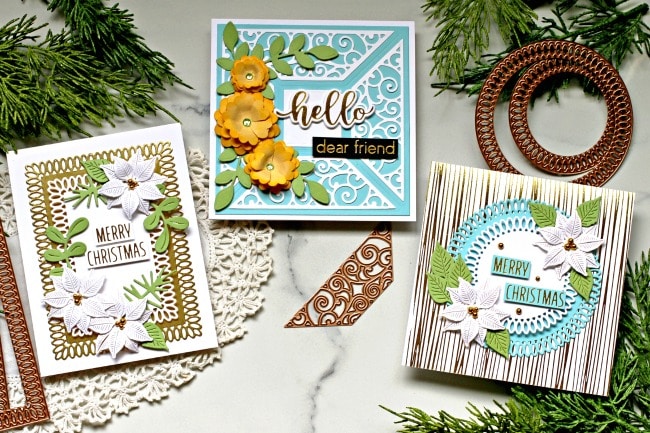
The versatility and beauty of these Picot Petite die sets is unmatched and I seriously had a hard time sticking to just three cards but here they are:
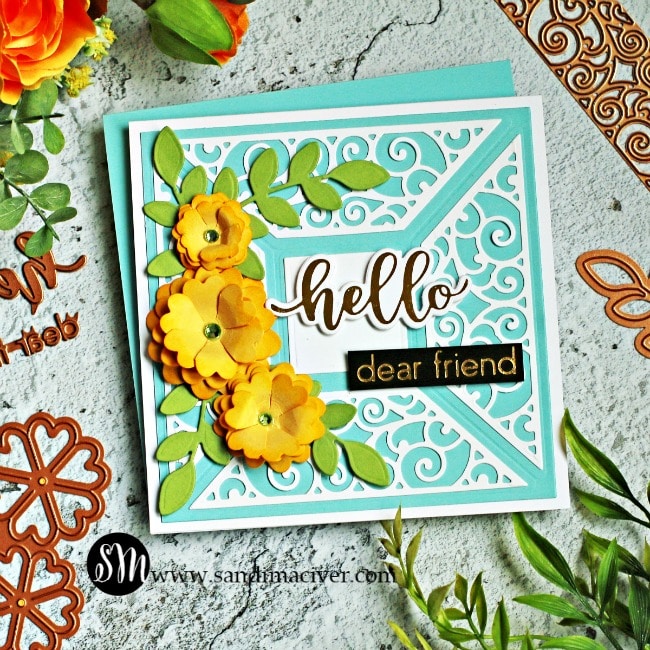
Spellbinders Picot Petite by Becca Feeken – Picot Petite Filigree Quartet Etched Dies – Card #1
- Die cutting the quartet from Whip Cream White card along with the center square piece.
Cut a piece of Pool Play at 4.25″ square and score it with the scoring die - Use white glue to attach the quartet pieces and the center square before attaching it to a 5″ square top folding card base.
- While waiting for the glimmer machine to heat up, die cut the Cinch and Go Flowers III – 4 times from Pineapple Smoothie card and the leaves 4 times from Lemon Grass cardstock.
- To make one of the flowers smaller, I fussy cut around the 4 pieces before layering them.
- Spritz each flower with water and scrunch up to add some height and dimension. When dry, sponge a bit of Pineapple Smoothie ink onto the tips before layering them with white glue.
- Add them to the left side of the card.
- Add the die cut leaves
- Use a green alcohol marker to color the Cut Rhinestones green for the center of each flower.
- Gold Glimmer Foil the two sentiments, trim and die cut and add to the card with foam tape for a 3-d effect.
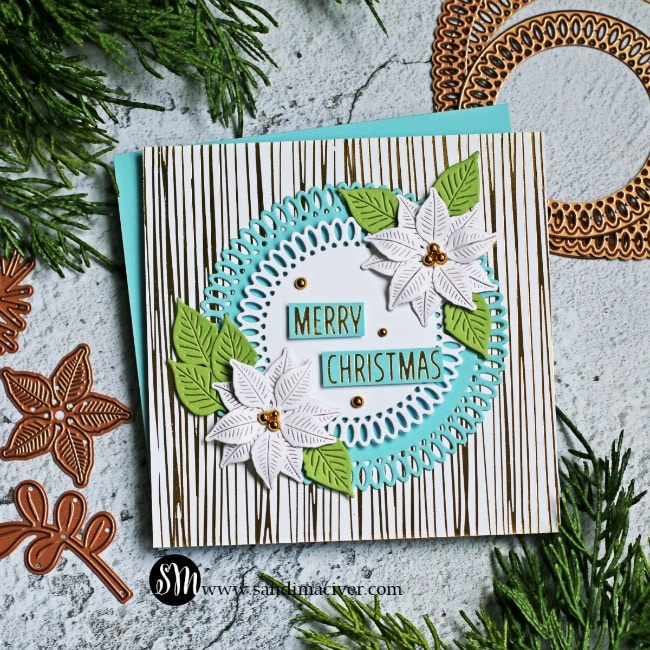
Spellbinders Picot Petite by Becca Feeken – Picot Petite Circles Etched Dies – Card 2
the sophisticated etched border on these dies makes for perfect (and super simple) layering for your card fronts. Once I had this one laid out, I decided it needed a little “background noise”, so I added gold foil stripes with the Modern lines Glimmer Plate. I like to start my Christmas Cards at this time of the year that way I’m not rushed and each get’s a little special attention, so here’s the first one:
- Gold Foil across a 5 x 5″ square of Whip Cream White before attaching it to a top folding 5″ Whip Cream card base.
- Use the medium circle die and a piece of Pool Play card 4-1/2 square for the base circle
- Use the Small Circle Die and a piece of Whip Cream card 3-1/2 Square for the top circle. Layer them with Foam tape before attaching to the center of the card base.
- Use the poinsettia and leaf dies from the Ornament Glimmer Hot Foil Plate set to create the florals. Each Poinsettia is cut twice and the petals rounded before layering and attaching to the card.
- Cut a total of 7 leaves from scraps of Lemon Grass card and use small drops of white glue to attach them.
- Add a large drop of glue to the center of each Poinsettia and add 3 Fashion Gold embellishments to each.
- Gold foil the sentiment pieces onto small scraps of Pool Play card, trim and attach with foam tape.
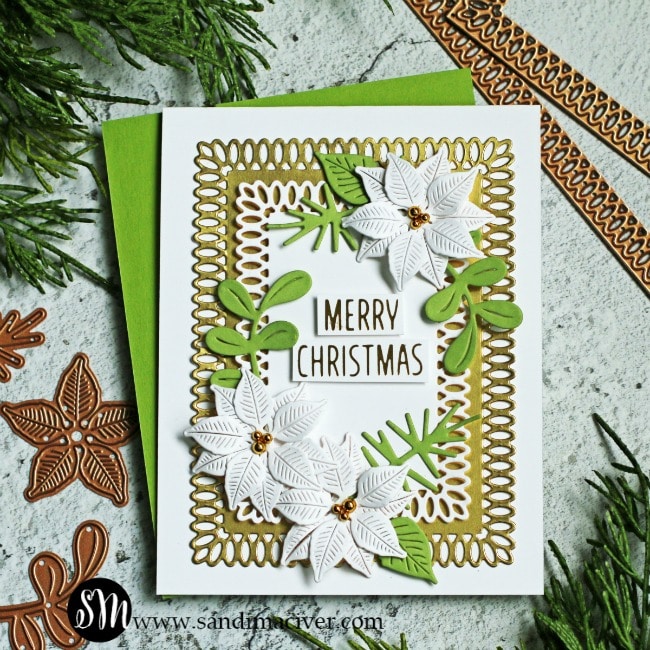
Spellbinders Picot Petite by Becca Feeken – Picot Petite Rectangles Etched Dies – Card 3
I’m over the moon for this rectangle etched die set. Horizontally or vertically, they make stunning cards for any occasion and just a couple of die cuts provides you with fabulous layers to really step up your card to FABULOUS. Here’s the second Christmas card for today.
- Die cut the medium Rectangle from Mirror Gold cardstock and the small rectangle die from Whip Cream Card.
- Layer with Foam Tape and attach to a side folding A2 White card base.
- Die cut 6 poinsettias and a variety of leaves from Whip Cream and Lemon Grass Card.
- Bend the poinsettia petals slightly before layering them with white glue and attaching to the card
- Use white glue to add the leaves
- Place a bit of white glue to the center of each flower and add 3 Fashion Gold Embellishments
- Gold Glimmer Foil the sentiment, trim and attach to the center of the card with foam tape.
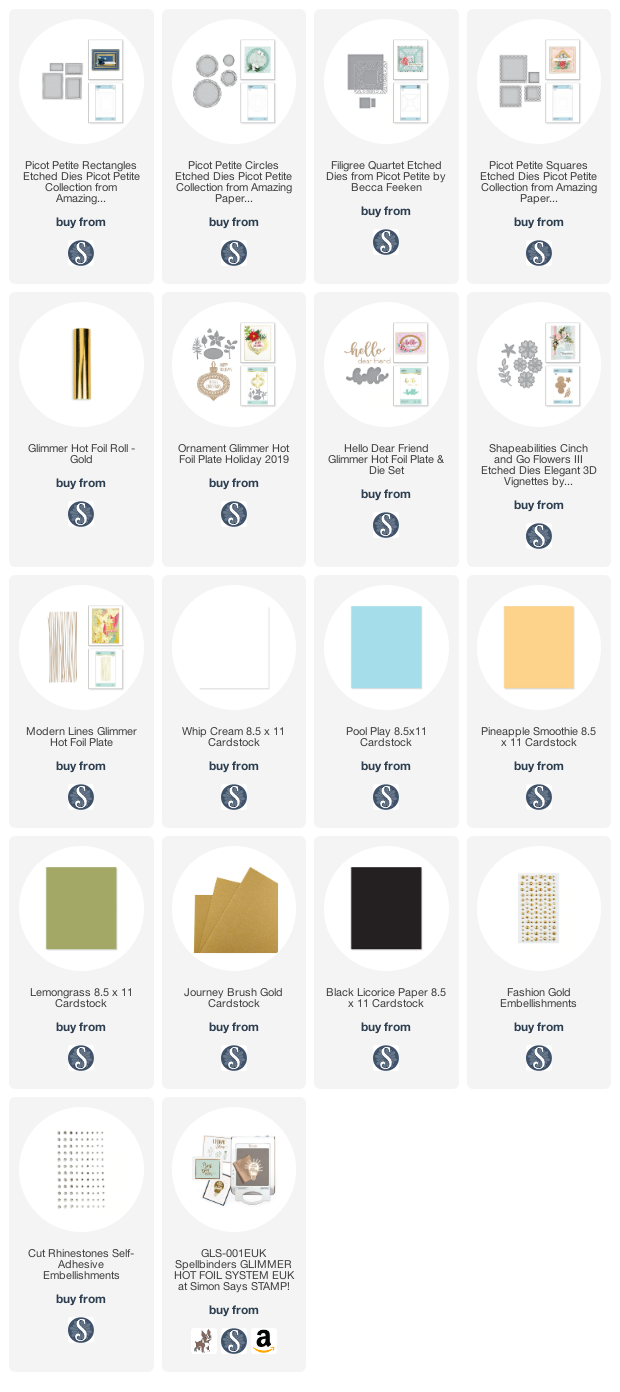
Spellbinders Products used:
That’s it for me today. I hope I provided some inspiration of different ways to use these fabulous new products and that you will give them a try.
Thanks so much for stopping by and a BIG thanks to Spellbinders for this guest spot. See you again soon.

used for the Spellbinders Picot Petite by Becca Feeken cards:
Want to find the products I used? I have them listed below. Compensated affiliate links used at no cost to you.
Thank you for your support, it helps to cover my blogging and video expenses.


-
- Follow me on INSTAGRAM
- Join 36,600+ following me on PINTEREST
- Subscribe to my YOUTUBE Channel
- Follow me on FACEBOOK
- Check out my FREE PDF Gallery for over 200+ Card Tutorials
- How to make a SLIMLINE CARD
 – LOTS of great sales and New Releases going on this week – Check them out here

Beautiful cards Sandi! Love the colors and those die cuts are amazing!
Wo! These are all AMAZING! Beautiful