
Hey card making friends, welcome back. I have a New Card Making Video – Alex Syberia Designs Hand Made Postage Cards to share with you today. I took the New Special Delivery Stamp/stencil/die bundle and created 4 NEW CARDS. I show you the step-by-step ink blending for each panel, and then at the end of the video, I show you how I assembled all 4 cards.
PLEASE NOTE: This post contains affiliate links. See below for my full disclosure
There is an INSTAGRAM HOP happening today with tons of inspiration and some fabulous surprises, so after you have watched today’s video, don’t forget to pop over to MY INSTAGRAM PAGE – AND FOLLOW THE HOP, leave a comment at each spot along the hop for a chance to win.
You can view the entire GOOD DAY RELEASE here.
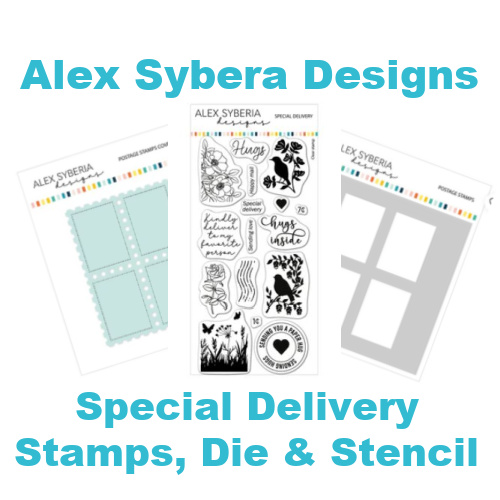
I’m using the Special Delivery Stamps, Die and Stencil today and creating 4 different cards, in 4 different styles. I love finding different ways to use my products, don’t you? I also incorporate some easy ink blending backgrounds to bring the images to life. Super easy, with the stencil overlay.
Products Used:
- Special Delivery Stamp Set
- Alex Syberia Designs Special Delivery Bundle
- Alex Syberia Designs Special Delivery Die
- Special Delivery Stencil
- Tulip Treasure Stamp Set
- Tulip Treasure Stencil set
- Thank you and Hello Dies
- Good Day Quilted Rectangles Die Set
Watch today’s New Card Making Video – Alex Syberia Designs Hand Made Postage Cards
Want more Distress Oxide Ink Blend Combinations?
Check out my Distress Oxide Inks Color Combos Page for more cards and videos
All of today’s cards are the same size, 4-1/4 x 5-1/2 (A2 size), with a white card base cut at 4-1/4″ x 11″, score and fold at 5-1/2″.
All the card fronts are 4-1/4″ x 5-1/2″ in a variety of colors and three of them are cut with the Good Day Quilted Rectangles Die Set, also new in this release, and the perfect quiet design backdrop for these pretty stamp images.
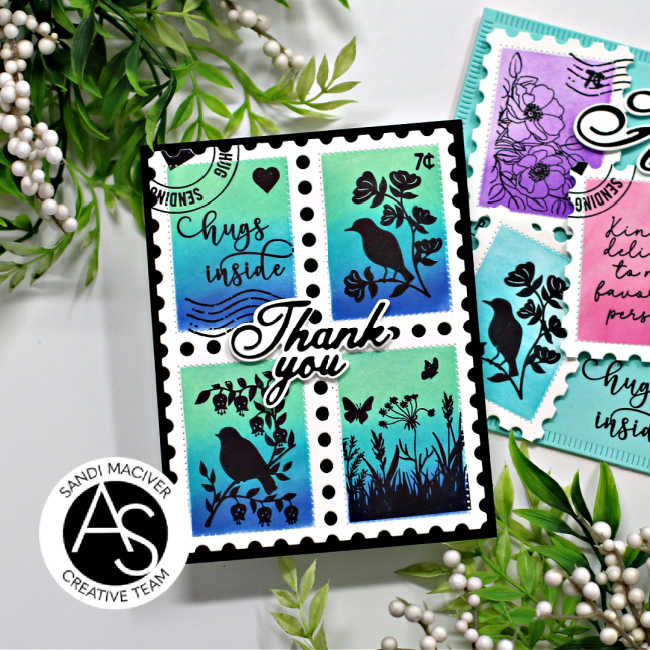
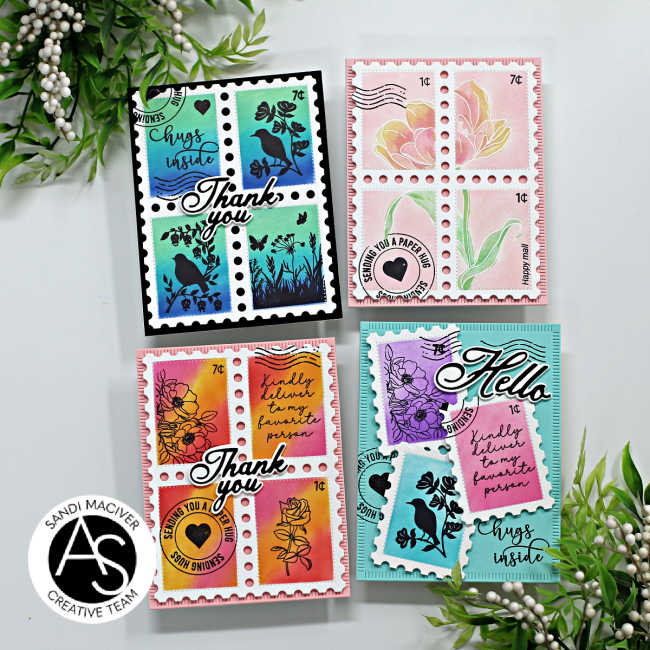
Alex Syberia Designs Hand Made Postage Cards – Card 1
Start with the white card base and attach a black card front.
Next, die cut the stamp panel, lay it onto the Waffle Flower 6.5″ x 8.5″ grip mat. Over that, place the Special Delivery Stencil.
Then, using ink blending tools or brushes, and Distress Oxide inks in Cracked pistachio, Peacock Feathers and Prize Ribbon, ink up each section with the three colors as demonstrated in the video below.
Heat set the ink with a heat tool and then place the panel inside the Misti Stamping tool with a Stickie Mat over the foam panel, so you don’t require magnets.
Finally, lay the Special Delivery Stamps over the colored panels. Close the Misti lid to secure the stamps, open again, ink with VersaFine Clair Nocturne Ink and stamp.
PRO-TIP – The VersaFine Clair Nocturne Ink is my favorite black ink for this technique. It’s super thick and juicy and you usually only have to stamp once. TIP #2 – buy the refill, you will need it.
Then, Die cut the sentiment using the Thank you and Hello dies also new this release. Use foam squares to attach the postage panel to the card front and to attach the sentiment to add depth to the card.
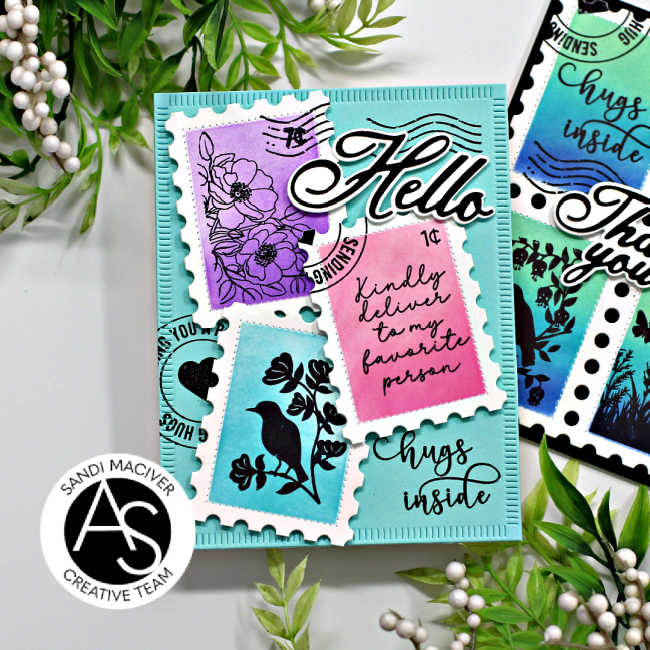
Alex Syberia Designs Hand Made Postage Cards – Card 2
The instructions for Card #2 are the same as card #1 with a few changes.
Distress Oxide Ink Colors: Festive Berries, Picked Raspberry and Spiced Marmalade.
Next, Ink blending is done on an angle and travels through the other stamps (see video for instructions on this).
PRO-TIP – this is kind of artsy, like the Northern Lights and could be done in many different color combinations.
Then, card front is Pink Sand from Spellbinders.
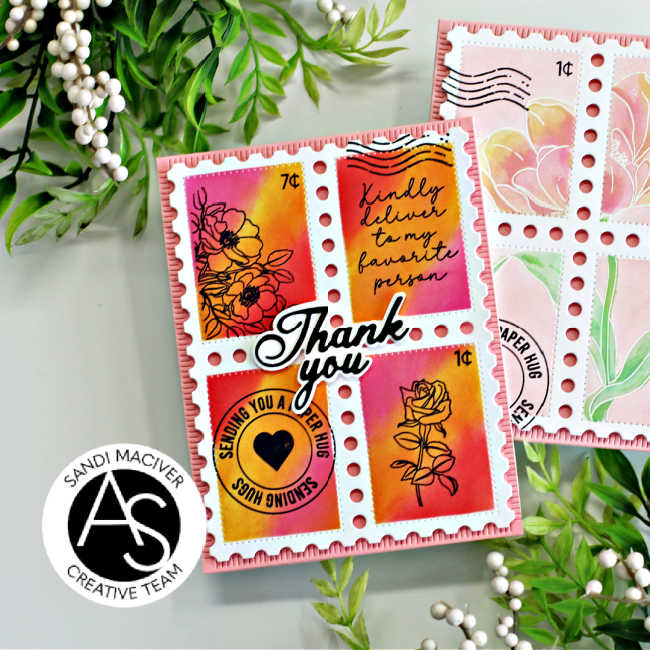
Alex Syberia Designs Hand Made Postage Cards – Card 3
Start by die cutting the card front with the Good Day Quilted Rectangles Die Set and attaching to the white card base. Place into the Misti and stamp in the three places shown in the image above.
Next, cut the postage panel and attach it to the Waffle Flower Grip Mat with the stencil over it.
Then, mask off 1 section at a time using post it notes. Add one solid color to each panel, going darker at the bottom. Move the panel to the Misti and stamp and image inside each one.
Finally, cut the four stamps apart and use three of them to decorate the card front. Add a sentiment using the Thank you and Hello Dies.
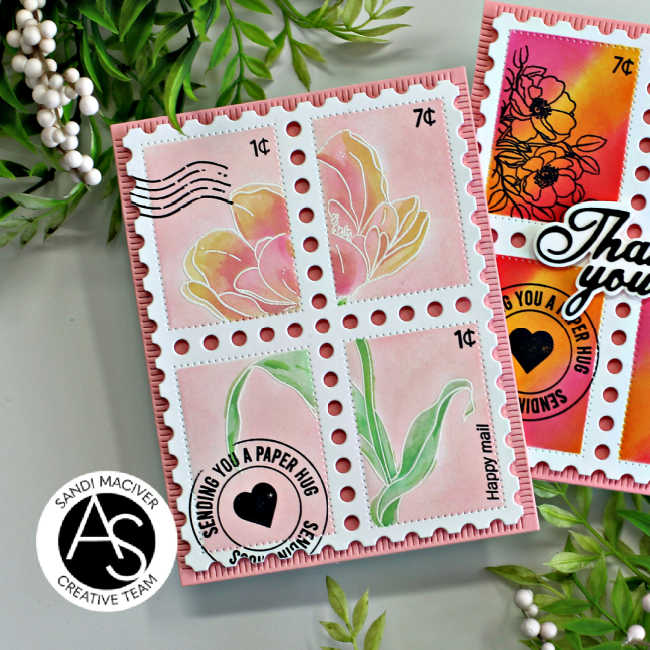
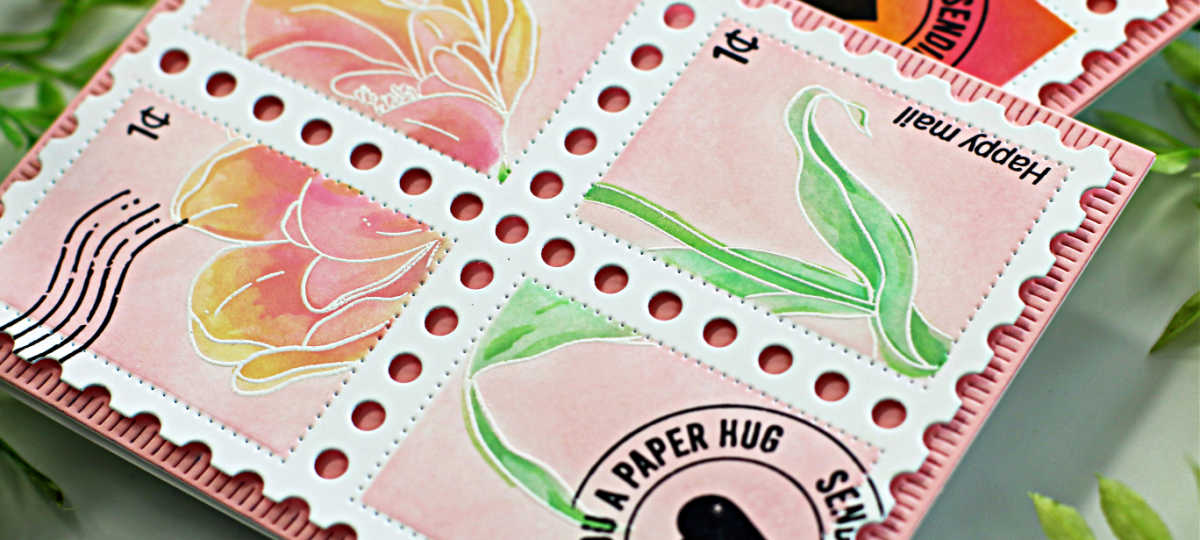
Alex Syberia Designs Hand Made Postage Cards – Card 4
Card #4 is my favorite this go around.
Start with the die cut panel in your Misti, cover it with the Special Delivery Stencil. Then, stamp the large tulip from Tulip Treasure Stamp and Stencil set with VersaMark Ink. Remove the panel from the Misti, cover with white embossing powder, shake off the excess and heat set.
Move the panel to the Grip Mat and secure. Place the Special Delivery Stencil back over it and gently go around the Tulip image with Spun Sugar Distress Oxide Inks to cover in the background.
Next, place the first Tulips stencil over the flower and add Spun Sugar Ink to the flower, with a bit of Scattered Straw Ink to the tips and Cracked Pistachio to the leaves. Go to stencil #2 and repeat, this time adding a bit of Kitsch Flamingo Ink (darker Pink) to the flower, and a second layer of Cracked Pistachio to the leaves. Repeat with the third stencil. Because you are adding three layers of ink, it will appear darker even though it’s the same color.
PRO-TIP – use small round blending brushes for Stencil #2 and #3. Because you are layering the ink 2 and 3 times, it’s going to appear darker even though you are using the same colors.
Finally, go back over the flower with the Spun Sugar ink blending too without adding any new ink, this will blend the colors together a bit.
Then, place the panel into the Misti and stamp with the postage stamps as shown in the video.
Finally, attach it to the light pink card panel, that has been die cut with the Good Day Quilted Rectangles Die Set.

Visit my Card Making PDF Gallery for 350+ more card ideas

Card Making Supplies used for the Alex Syberia Designs Hand Made Postage Cards:
Here are the products I used today. Compensated affiliate links used where available at no cost to you.
Clicking on a thumbnail link and shopping provides me with a small commission (at no additional cost to you), which supports my website and allows me to continue bringing you new projects and videos. Thank you for your support. Affiliate and product disclosure are found on my disclosure page. All products were personally purchased except for Alex Syberia Designs Special Delivery Stamps, dies and stencil which were provided/sponsored by the company. As always, I was not paid to do this post. I only use and recommend products I love. Click on the icons below each product picture to go to my favorite stores.


-
-
- Follow me on INSTAGRAM
- Join 38,000+ following me on PINTEREST
- Subscribe to my YOUTUBE Channel
- Follow me on FACEBOOK
- JOIN my STAMP OBSESSION Facebook Group
- Check out my FREE PDF Gallery for over 350+ Card Making Tutorials
- How to make a SLIMLINE CARD – Info PAGE
- Do you like to stitch on cards? Then join our NEW FACEBOOK GROUP
-

– LOTS of great Paper Crafting Sales and New Releases going on this week – Check them out here
 Shop my Favorite Brands with my affiliate links
If you do place an order using my affiliate links (and thank you if you do) – please email me with the $$ amount before tax and shipping, and which company it was placed through, along with your mailing address and I’ll send you a hand made card as my thank you. [email protected]
The reason I ask for that specific info is the system that tracks the sales only gives us a dollar amount and company name, we do not know who made the sale.
These are fabulous! There aren’t many single images that will fit!
Thanks Sharon, actually, these are a lot bigger than many out there right now and I found all kinds of images that would fit, but also, Alex Created the stamp set exclusively for them
Those are awesome Sandi! Love the postage stamp look, pretty colors and images too! 🙂
thank you Amy
Love this set and you have made some beautiful art piece from it. Your video was great. I always love watching how you made your creations. Were those domed blending tools or flat?
Thank you Gayle. Those were flat blending tools, so I could just use the edge of them for the smaller areas.
Thanks so much Sandi for both the detailed blog and your video. I always feel that your videos are so charming. Gorgeous cards by the way.
Aw thank you Lisa, I try and share all the info I would want if I was new and trying to replicate the cards
I love this! So beautiful Sandi!
thank you Natasha
Gorgeous cards! I love this postage die and all those wonderful images that make for super creations. Thanks so much for the inspiration! Have a good day! 🙂
Wow these sure are pretty! I love this postage die set and all the different ways you have added colour and images to them. I particularly love the soft pink card which is highly unusual for a gal that love brights!