
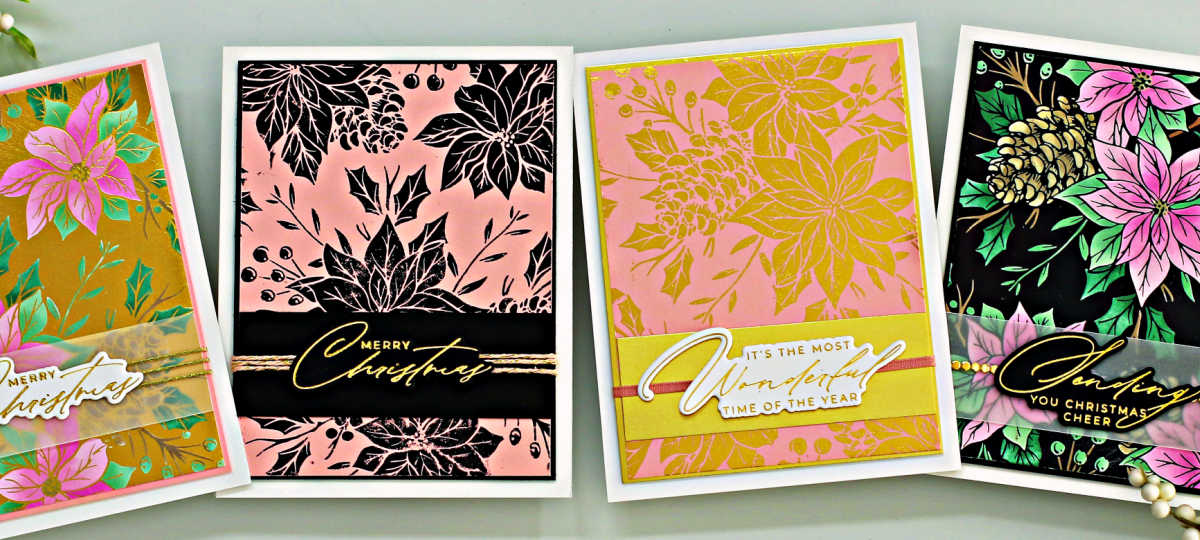
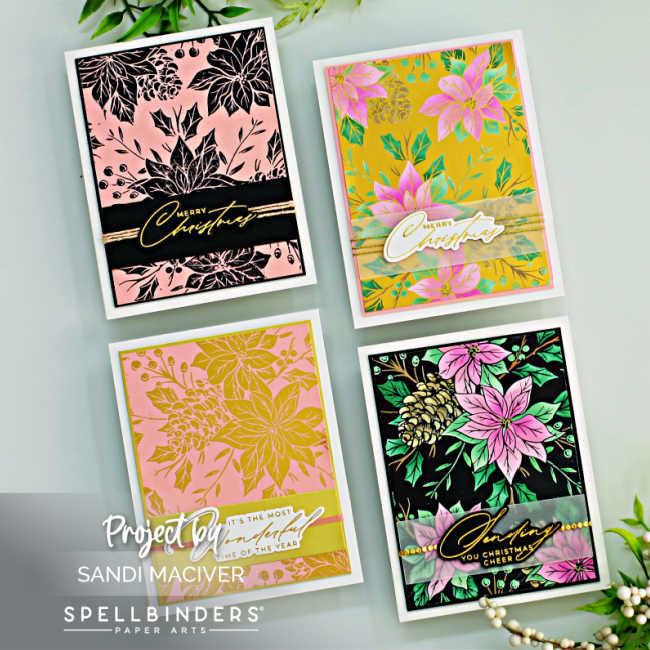
Welcome back to my card making blog. Today, I’m sharing 4 cards I created with Foiling With BetterPress Plates. Yana has a new release over at Spellbinders; as usual, it’s lovely. I used Yana’s Festive Poinsettias and Home for Christmas Sentiments for today’s cards. The release also has Yana’s Amaryllis Etched Dies and Amaryllis Garden 3D embossing Folder, which are used in an upcoming post.
PLEASE NOTE: This post contains affiliate links. See below for my full disclosure
Inks used on today’s projects are the Simon Says Stamp Pawsitively Saturated Inks: Pinks: Bubblegum, Carnation and Sweets. Greens: Aspen, Sage and Pine and Browns: Latte, cappuccino and Allspice.
As you probably know, you can Glimmer Hot Foil with BetterPress Plates, and I love to do this. It makes the plates that much more usable and when you want a black background, you often have to ink the BetterPress plate numerous times to get good coverage, whereas if you black foil it, you do it once.
Taking the foiling one step further, I hate wasting the foil that remains after you do your initial foiling, so today’s video shows you how I “reverse foil”, and make another card from the same piece.
Foiling with BetterPress Plates
The steps for foiling with a BetterPress Plate are the same as Glimmer Hot foiling, except I like to add one additional piece of cardstock with my cover plates before I run it through the die cutting machine. This ensures good strong pressure for transferring the foil.
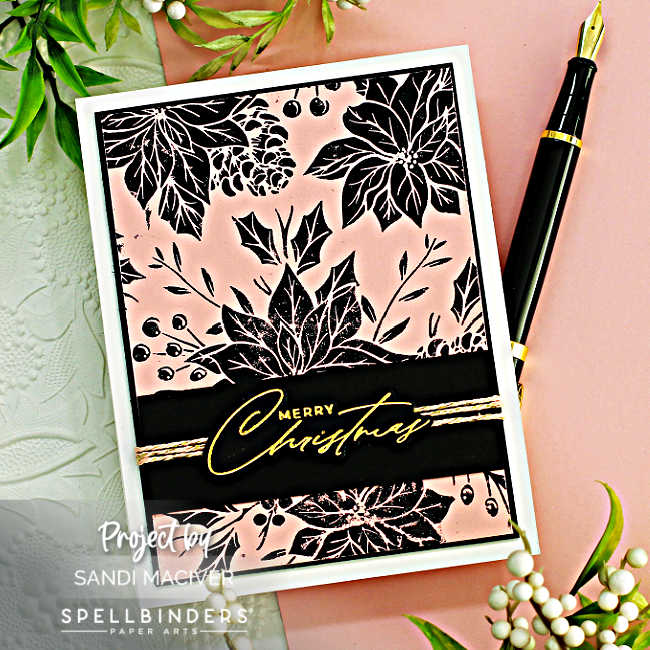
Once you have foiled the initial image, you are left with the reverse (in this case the poinsettias and leaves), on the foil, as only the background has been transferred. To me, this is such a waste, so I purchased the Pink fresh Solid Hot Foil Plate A2 sized, so I could reverse foil.
You want to place the Solid Hot Foil Plate on your glimmer hot foil machine and make sure it’s good and hot, then place the once used foil down, good side down, a piece of cardstock on top, and foil again. This gives you the reverse of the image on your cardstock – hence, an additional card from the same sheet of foil.
Foiling with BetterPress Plates – Stenciling the Images.
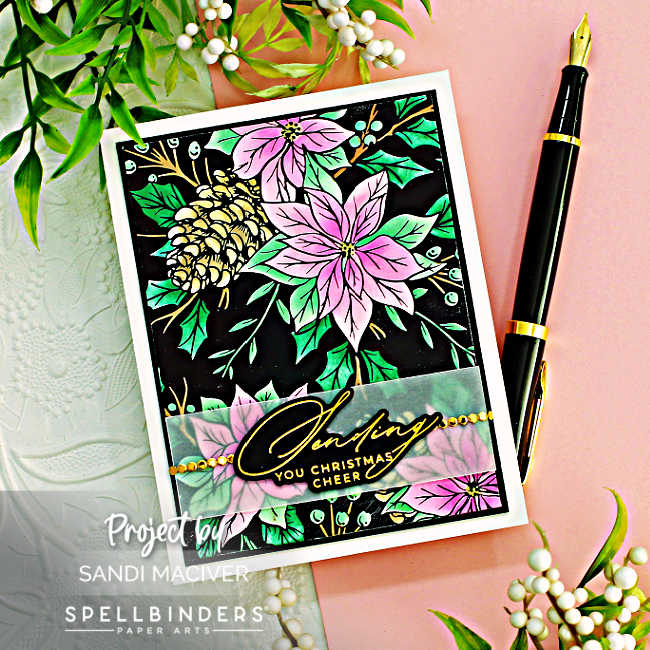
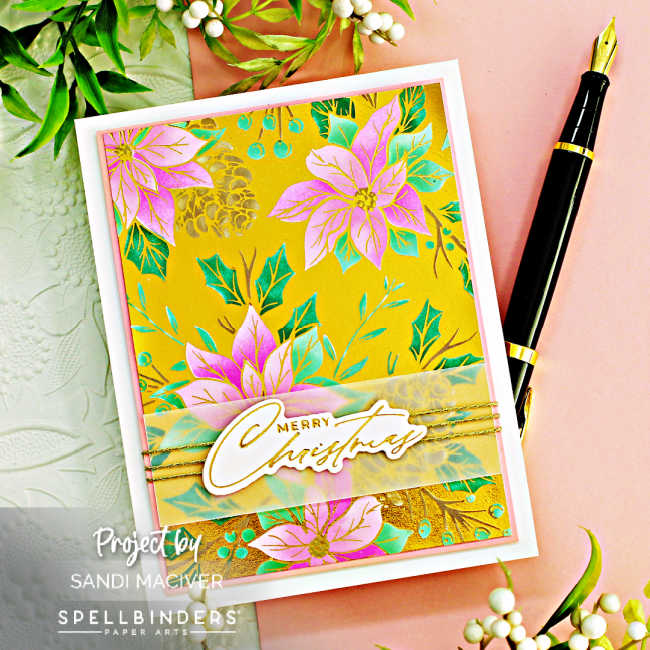
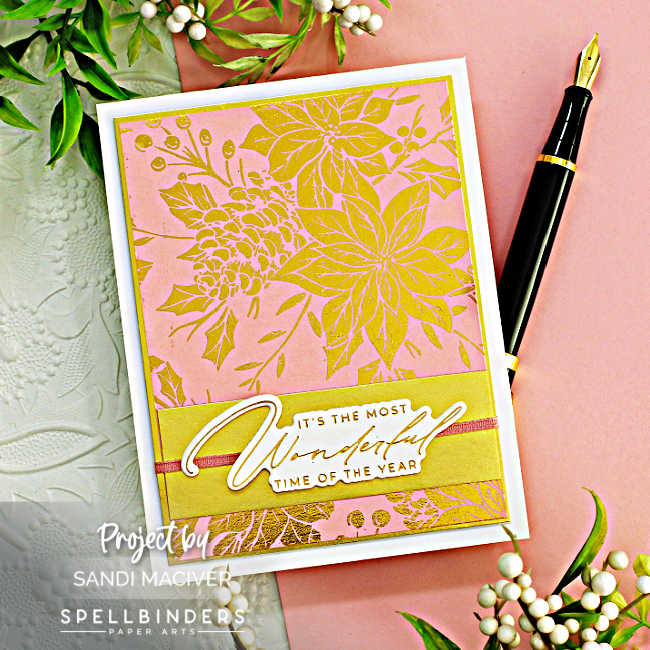
Starting with the initial glimmer foiled image using the Festive Poinsettias BetterPress Plate, there is a coordinating stencil set. In the video I show you each of the 6 steps and stencil the entire piece.
Next, cut the piece down to 3-3/4″ x 5″, then cut a coordinating matte 3-7/8 x 5-1/8. Add foam tape strips to the back.
Then, cut a matte for your sentiment, for this card I used a piece of vellum 1-1/4″ x 3-7/8″ held down with a couple of glue dots while I wrapped ribbon over it. Then, attached it to a A2 sized white card base (4-1/4″ x 11″, score and fold at 5-1/2″).
Finally, add a sentiment using the Home for Christmas Sentiments BetterPress Plates. I also glimmer foiled these in Polished Brass Glimmer Foil and cut them out with the coordinating dies.
The second Card:
The second foiling results in a silhouette image of the flowers and leaves, the ones you stencil on the first one. These are beautiful foiled onto colored cardstock and make a super fast and easy card.
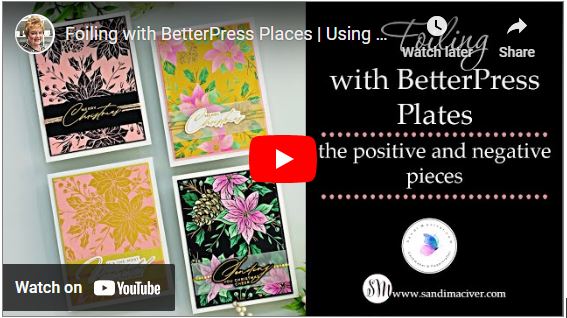
Here’s today’s Foiling with BetterPress Plates Card making Video for you. It walks you through each foiling step, then all 6 layers of the stenciling and finally, putting the cards together.
Visit my Card Making PDF Gallery for 350+ more card ideas.

Card Making Supplies used for the Spellbinders Foiling with BetterPress Plates Cards:
Here are the products I used today. Compensated affiliate links used were available at no cost to you.
Clicking on a thumbnail link and shopping provides me with a small commission (at no additional cost to you), which supports my website and allows me to continue bringing you new projects and videos. Thank you for your support. Affiliate and product disclosures are found on my disclosure page. All products were personally purchased except for Spellbinders Yana’s Festive Poinsettias and Home for Christmas Sentiments release which were provided/sponsored by the company. As always, I was not paid to do this post. I only use and recommend products I love. Click on the icons below each product picture to go to my favorite stores.


-
-
- Follow me on INSTAGRAM
- Join 38,000+ following me on PINTEREST
- Subscribe to my YOUTUBE Channel
- Follow me on FACEBOOK
- JOIN my STAMP OBSESSION Facebook Group
- Check out my FREE PDF Gallery for over 350+ Card Making Tutorials
- How to make a SLIMLINE CARD – Info PAGE
- Do you like to stitch on cards? Then join our NEW FACEBOOK GROUP
-

– LOTS of great Paper Crafting Sales and New Releases going on this week – Check them out here
 Shop my Favorite Brands with my affiliate links
If you do place an order using my affiliate links (and thank you if you do) – please email me with the $$ amount before tax and shipping, and which company it was placed through, along with your mailing address and I’ll send you a hand made card as my thank you. [email protected]
The reason I ask for that specific info is the system that tracks the sales only gives us a dollar amount and company name, we do not know who made the sale.
Oh my goodness, your cards are stunning Sandi! Love the gold touches and those poinsettias are beautiful! 🙂
Thank you Amy, I truly love to foil
WOW! Once again you have been busy, making in multiples! These are
just splendid, love the shine on all of them! I love seeing your projects
and Yana’s! I suppose I shall have to do some playing and practicing!!!!
Thank you Sharon, these are so fast and easy to do, it’s amazing
These are LOVELY! Great way to stretch supplies and get max bang for buck.
Lori S in PA
Thanks Lori, I’m really to cheap to throw out unused foil, haha
They are all stunning Sandi and yay for using leftover foil! Bravo!
thank you Lisa
Great video, Sandi! Thanks for all the wonderful little tips along the way. Beautiful cards and I love seeing you use the leftover for a second card.
Thanks so much for watching Gayle, yep, I hate wasting those foiling bits, LOL
Wow wow wow! These are all
stunning
thank you my friend