
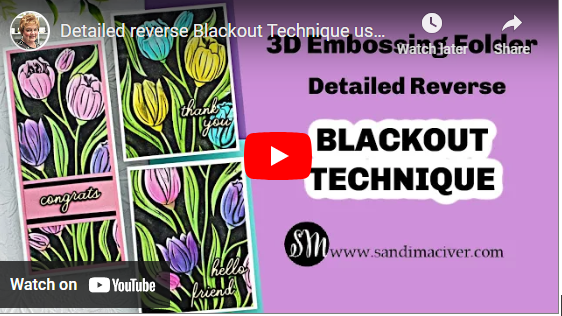
Hi card making friends, welcome back. Today I have a NEW VIDEO – Detailed Reverse Blackout Technique using a NEW Twirling Tulips Embossing folder from Simon Hurley. He has a NEW RELEASE over at Spellbinders today the Simon Hurley TULIP GARDEN COLLECTION and you are going to love these beautiful spring products.
PLEASE NOTE: This post contains affiliate links. See below for my full disclosure.

So, this is similar to my MESSY Watercolor Blackout Technique video I did last year, but it’s even easier. We are going to use the reverse side of the embossed image, the one where the flowers are indented. It’s so easy, you are going to LOVE IT. The “Detail”, is we are targeting where the colored ink goes this time instead of just a random watercolor as in the last video. The “Reverse”, is we are going to use the back side of the embossed image, or the DEBOSSED side for our project today.

You NEED a 3-D embossing folder for this technique and as I said, I’m using the new Twirling Tulips folder, BUT, Spellbinders has lots of 3-D Embossing Folders and a bunch of them are on sale this week here.

Detailed Reverse Blackout Technique – Slimline Card
Start by cutting the white cardstock at 3-1/4″ x 8″ and spritzing both sizes with the Spellbinders Mighty Mister Spray Bottle before placing inside the embossing folder and running it through the Platinum 6 Die Cutting Machine.
Next, on the indented side of the panel, use blending brushes to add ink to the tulips and leaves.
Then, lay the panel flat and drag the VersaFine Clair Nocturne (black) ink pad down the panel, moving across the piece until the background is completely black. (watch the video for this step).
Pro-TIP – the VersaFine Clair Nocturne is my FAVORITE black ink pad. It’s so juicy and the color is so deep, it’s my go to for sentiment stamping etc.
Finally, cut a Sand Pink matt 3-1/2″ x 8-1/4 and a white card base 7-1/2″ x 8-1/2″, score and fold at 3-3/4. Create a belly band out of the left over scraps and cut a sentiment using the Handwritten Sentiments Etched Dies.
Get more info about making SLIMLINE CARDS here.

Detailed Reverse Blackout Technique A2 Sized Cards
Start by cutting a white panel 4″ x 1/4″, spritz it and emboss it.
The next few steps are the same as above.
Then, create aA2 sized white card base, 4-1/4″ x 11″, score and fold at 4-1/2″. Die cut the sentiments with the Handwritten Sentiments Etched Dies in Black and gold.
Here is the Detailed Reverse Blackout Technique Video
– you can watch it here or over on my YOUTUBE CHANNEL

Visit my Card Making PDF Gallery for 350+ more card ideas

Card Making Supplies used for the Detailed Reverse Blackout Technique Cards:
Here are the products I used today. Compensated affiliate links used where available at no cost to you.
Clicking on a thumbnail link and shopping provides me with a small commission which supports my website and allows me to continue bringing you new projects and videos. Thank you for your support. Affiliate and product disclosure are found on my disclosure page. All products were personally purchased except for Spellbinders/Simon Hurley Tulip Garden Collection which were provided/sponsored by the company. As always, I was not paid to do this post. I only use and recommend products I love. Click on the icons below each product picture to go to my favorite stores.


-
-
- Follow me on INSTAGRAM
- Join 38,000+ following me on PINTEREST
- Subscribe to my YOUTUBE Channel
- Follow me on FACEBOOK
- JOIN my STAMP OBSESSION Facebook Group
- Check out my FREE PDF Gallery for over 350+ Card Making Tutorials
- How to make a SLIMLINE CARD – Info PAGE
- Do you like to stitch on cards? Then join our NEW FACEBOOK GROUP
-

– LOTS of great Paper Crafting Sales and New Releases going on this week – Check them out here
 Shop my Favorite Brands with my affiliate links
If you do place an order using my affiliate links (and thank you if you do) – please email me with the $$ amount before tax and shipping, and which company it was placed through, along with your mailing address and I’ll send you a hand made card as my thank you. [email protected]
The reason I ask for that specific info is the system that tracks the sales only gives us a dollar amount and company name, we do not know who made the sale.
Those tulips are stunning!! Love the colors and the layouts are perfect! 🙂
Thank you Amy
Awesome, Sandi! Love the black background, really
makes the gorgeous tulips pop!
Thank you Sharon, it’s a super fun technique
What an amazing technique, Sandi. I can’t wait to try it out!
thank you Gayle, have fun with it
I love these tulips! Gorgeous ❤️❤️❤️❤️❤️❤️❤️
hanks so much girlfriend
Love this technique! Can’t wait to try it out.
Thanks Chris, have fun with it, it’s very addicting, LOL
clever technique which is on my list to try. love these pretty cards Sandi
it’s so fun Lisa, have a blast with it