
Hey card making friends. Today I have Spellbinders Stitchmas SPOILERS Day 1 – 6…THAT MEANS – if you don’t want to see what is in the first six days of the Spellbinders 12 Days of Stitchmas Kit, Then, don’t scroll down any further. LOL, I don’t want to spoil your fun if you are planning on ordering the kit.
I took each of the projects for the first six days, stitched them and put them together. Then I added a few extra elements and either created a Christmas Card or a Christmas Tag out of them. Of course, you could also make each one of them into a tree ornament. Sure to be a keepsake for years to come.
PLEASE NOTE: This post contains affiliate links. See below for my full disclosure.
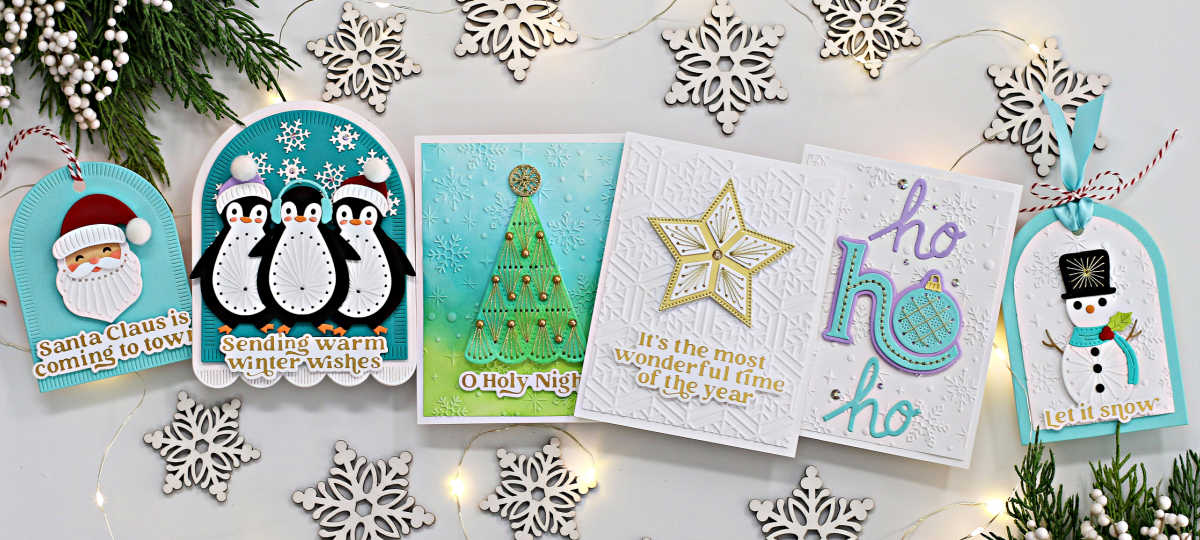
These were SO MUCH FUN to create. I love stitching, stitching on cards is a blast and then figuring out what to do with them after they are put together is even more fun, digging through my stash for fun things to add to them. So here you go, from Day 1 through Day 6, my 12 Days of Stitchmas projects.
Spellbinders Stitchmas SPOILERS Day 1 – 6 – Day 1
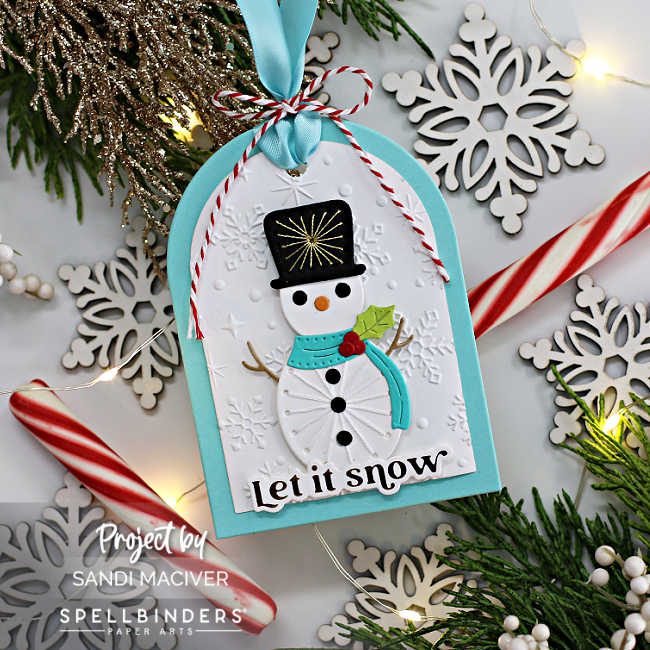
You have already seen the snowman, I added him to a tag I created with the Essential Arches Die set cut in Waterfall and White. Emboss the white piece with the Sparkling Snow Embossing Folder from the Simon Hurley Snow Globe Collection. Gold Glimmer Foil the sentiment using the Wonderful Winter Sentiments also from the Simon Hurley Snow Globes Collection.
Spellbinders Stitchmas SPOILERS Day 1 – 6 – Day 2
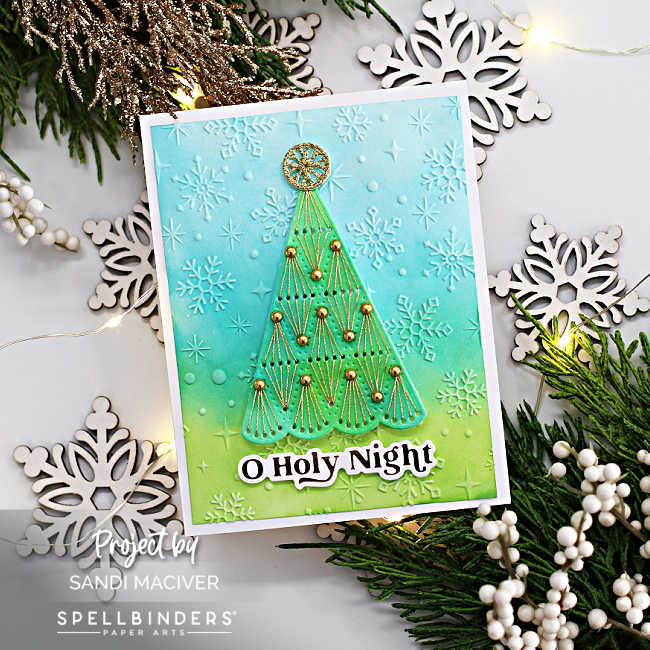
Day 2 is a beautiful Christmas tree with options. You can stitch the entire base panel as I did, or you can die cut panels and stitch them as an overlay. I used Spellbinders Gold DMC thread to stitch the tree and then added the gold ball embellishments. Goodness, I just noticed I’m missing two, haha, oh well.
Next, the paper the tree is cut from is watercolor paper and I used Lindy’s Magical Powders to add teals and greens.
Then, the 4″ x 5-1/4″ card front panel is white, ink blend with Distress Oxide Inks in Mowed Lawn, Salvaged Patina and Peacock Feathers and then emboss with the Sparkling Snow Embossing Folder.
Finally, add the sentiment also in Gold Glimmer Foil using the Wonderful Winter Sentiments plates.
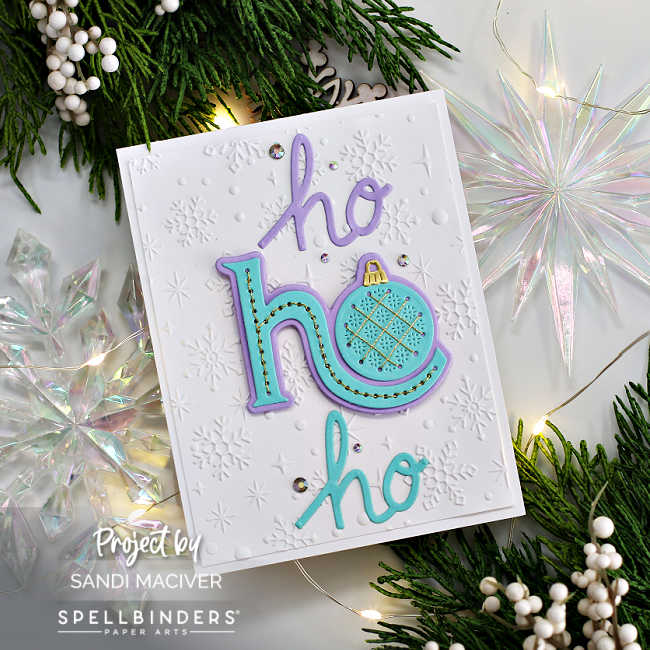
Spellbinders Stitchmas SPOILERS Day 1 – 6 – Day 3
Start with a card front 4″ x 5-1/4″ and emboss it with the Sparkling Snow embossing folder before attaching it to a top folding A2 sized white card base.
Next, cut the images from purple and teal cardstock. Use the Gold DMC thread to stitch.
Then, attach all 3 pieces to the card front and embellish with the Spectrum AB Color Essential Gems.
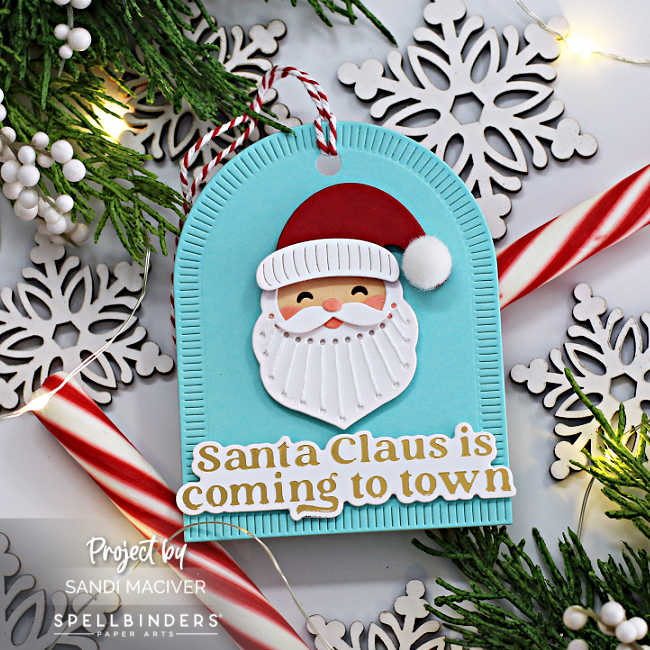
Spellbinders Stitchmas SPOILERS Day 1 – 6 – Day 4
Start by die cutting the tag using the Make a Wish Arch Labels from Waterfall card stock.
Next, die cut Santa, stitch his beard and glue him together. I used a white pompom on his hat instead of the flat die cut.
Also, I cut his face from white cardstock and used Copics E21 for his skin, and E21 – R20 and R21 for his cheeks and nose
Finally, attach Santa to the center of the tag. Add a sentiment glimmer foiled using the Wonderful Winter Sentiments and add some red and white striped thread.
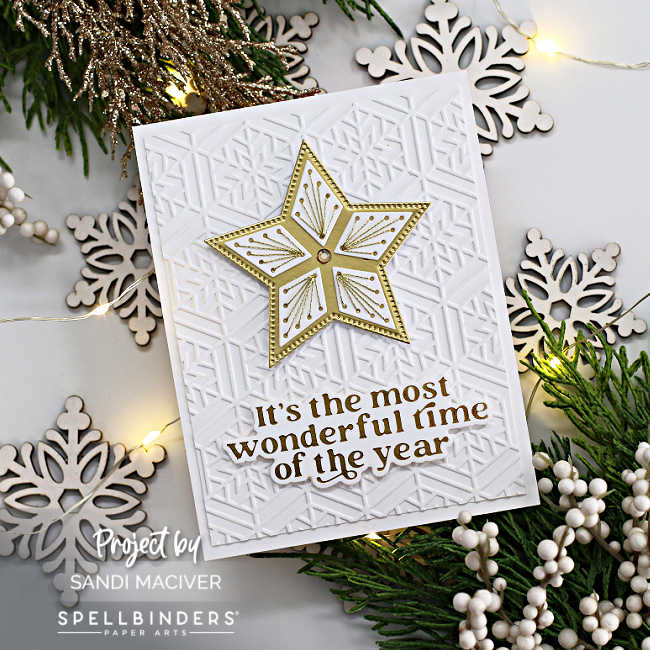
Spellbinders Stitchmas SPOILERS Day 1 – 6 – Day 5
Again, start with a 4″ x 5-1/4″ piece of white cardstock and emboss it with the Hexi Snowflake Embossing Folder.
Next, cut the day 5 dies from white and gold card stock, stitch the white pieces in the DMC gold thread and glue over the gold star.
Attach to the front of the card and add the Gold Glimmer Foiled sentiment from the Wonderful Winter Sentiments Collection.
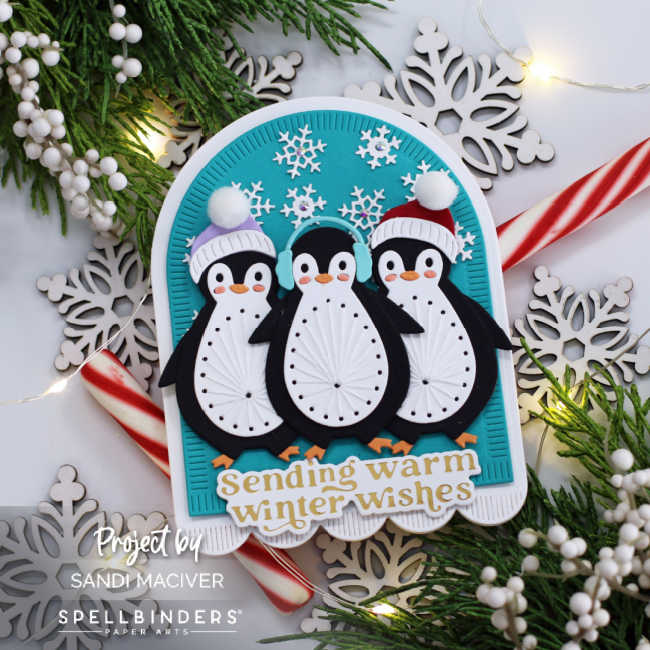
Day 6
Start by die cutting the tag base with the Make a Wish Arch Labels. I actually cut the white piece twice, and attached them at the top to made a card.
Next, die cut all the penguin pieces, stitch the white tummies and glue them together.
Then, die cut the snowflake dies and glue them across the top of the tag front.
Add the penguins using foam squares to pop them up.
Finally, add a gold foiled sentiment from the Wonderful Winter Sentiments and embellish the center of each snowflake with the Spectrum AB Color Essential Gems.
That’s it for me today, I hope you enjoyed all my stitched projects.
Visit my Card Making PDF Gallery for 350+ more card ideas

Card Making Supplies used for the Spellbinders Stitchmas SPOILERS Day 1 – 6 cards and tags:
Here are the products I used today. Compensated affiliate links used where available at no cost to you.
Clicking on a thumbnail link and shopping provides me with a small commission (at no additional cost to you), which supports my website and allows me to continue bringing you new projects and videos. Thank you for your support. Affiliate and product disclosure are found on my disclosure page. All products were personally purchased except for Spellbinders 12 Days of Stitchmas was provided/sponsored by the company. As always, I was not paid to do this post. I only use and recommend products I love. Click on the icons below each product picture to go to my favorite stores.


-
-
- Follow me on INSTAGRAM
- Join 38,000+ following me on PINTEREST
- Subscribe to my YOUTUBE Channel
- Follow me on FACEBOOK
- JOIN my STAMP OBSESSION Facebook Group
- Check out my FREE PDF Gallery for over 350+ Card Making Tutorials
- How to make a SLIMLINE CARD – Info PAGE
- Do you like to stitch on cards? Then join our NEW FACEBOOK GROUP
-

– LOTS of great Paper Crafting Sales and New Releases going on this week – Check them out here
 Shop my Favorite Brands with my affiliate links
If you do place an order using my affiliate links (and thank you if you do) – please email me with the $$ amount before tax and shipping, and which company it was placed through, along with your mailing address and I’ll send you a hand made card as my thank you. [email protected]
The reason I ask for that specific info is the system that tracks the sales only gives us a dollar amount and company name, we do not know who made the sale.
Wow! Fabulous cards and tags. Thank you for the inspiration.
Thanks so much Patricia
Oh my goodness, such cute cards and tags! Love the fun colors and images!
Thank you Amy, I’m a big fan of stitching on cards those these were fun
So happy that I ordered these the day they arrived. I am stockpiling for next summer already. I will see if I can get any made for this Dec.
Your projects are FABULOUS, Sandi.
Lori S in PA
thanks so much Lori, and have fun with yours
These are fabulous, Sandi! Love them all, such bright and happy, non-traditional colours!
I like the embossing touch, too!
thank you Sharon, I love adding embossed backgrounds, it’s such an easy way to add beautiful detail and background noise to a card