
Today, I’m sharing how to Easily Add Texture to Handmade Cards. I’m using more Spellbinders February Club products to add interest and dimension to my handmade cards.
Affiliate links are used throughout this post at no additional cost to you. This allows me to keep bringing you content. I appreciate your support.
Adding texture to your handmade cards adds interest and intrigue. You spend more time admiring the beauty of a layered card. You want to touch and feel the textures in the layers. In today’s post I’ll share 3 easy ways to achieve this along with a list of products I use for each one.
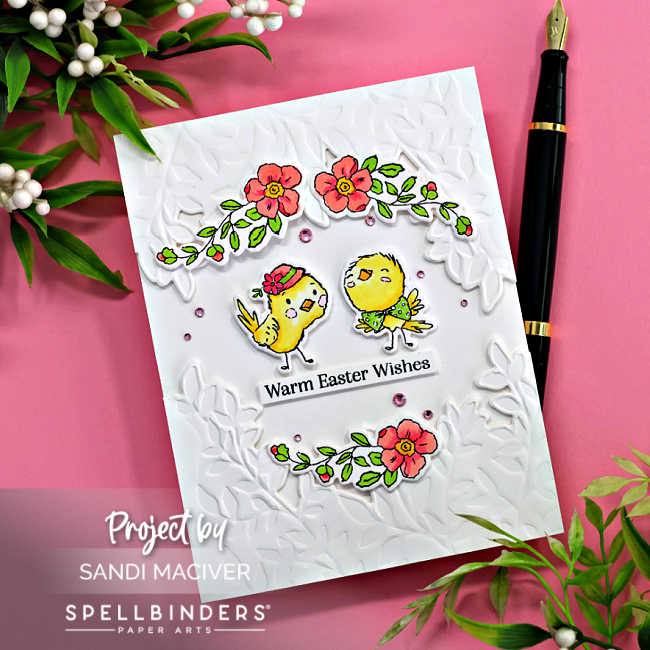
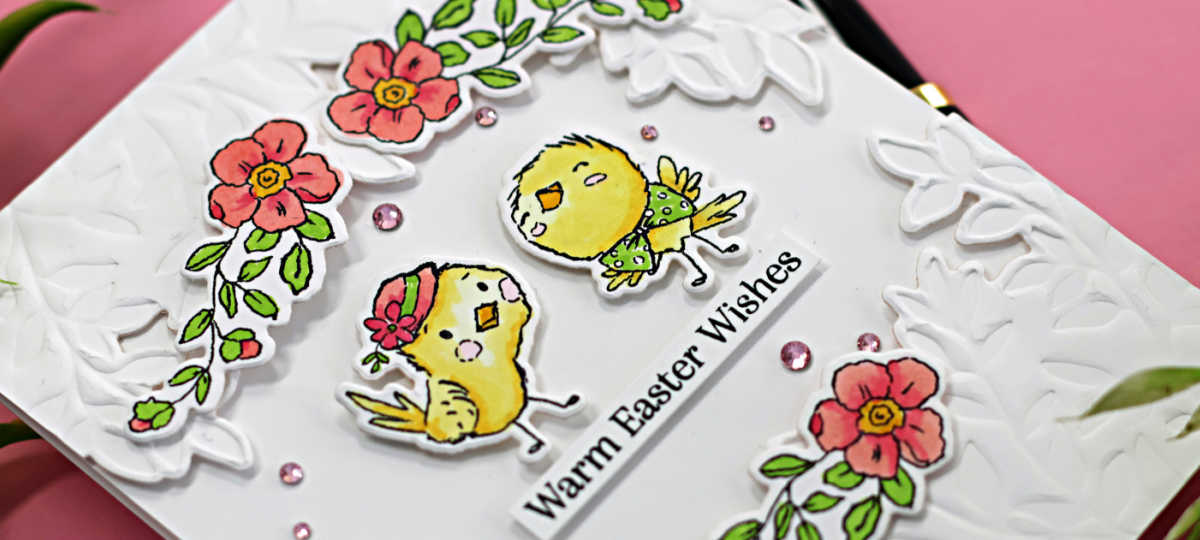
How to Easily Add Texture to Handmade Cards – Card #1 – Embossing with a Glimmer Plate.
Products Used:
- Spring Smiles – Clear Stamp and Die Set Feb/2025
- Spring Canopy – Glimmer of the Month Feb/2025
- (E) – Embossing Plate from the Universal Plate System
Up first, we are going to emboss the top and bottom overlay panels with a Glimmer Plate.
Start by creating an A2 Sized White card base 4-1/4″ x 11″, score and fold at 5-1/2″.
Next, using two pieces of the matching white cardstock, 4-1/4″ x 5-1/2″ you will use the Spring Canopy Glimmer Plate to emboss the leaves.
Start by die cutting the leaf edge from the cardstock pieces. Then, line up the edge with the glimmer plate in your Platinum die cutting machine.
Take out the bottom cutting plate, and instead, cover the glimmer plate and cardstock with the (E) Embossing Mat, then the top cutting plate.
Run this through your machine and you will get a beautifully embossed panel.
Finally, add foam squares to the back around the leaf edge, then line up the panels at the top and bottom of your card, leaving enough room for the sentiment and embellishments in the center. Flip the card over and cut off the overhang, then add glue across the top and bottom of the card base, to secure the embossed panels.
NOTE: If you emboss first and die cut second, you will end up with a flatter embossing out near the edge of your card (as show in the above picture). The die cutting process will flatten out your embossing, but the die around the edge protects that part of it from flattening. This is why I suggest die cutting first, it’s a bit more finicky, but you can use some tape to hold it in place.
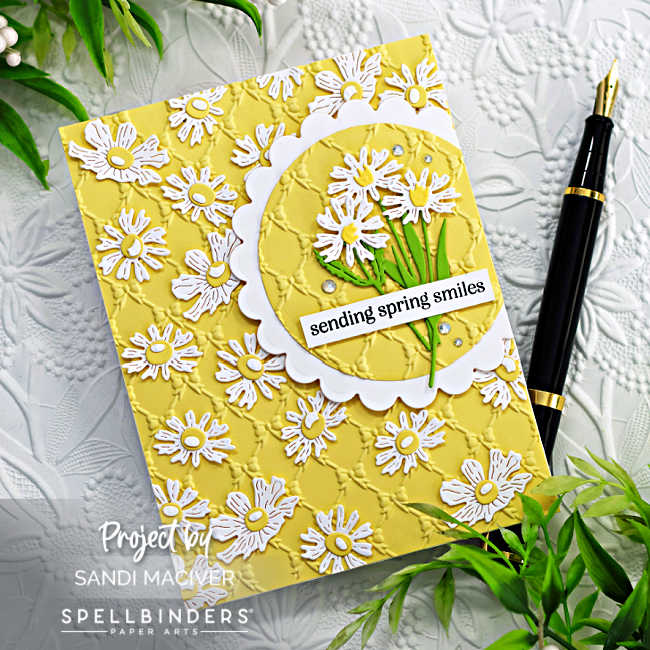
How to Easily Add Texture to Handmade Cards – Card #2 – Embossing Folder with a Die Cut Overlay.
Products Used:
- Spring Smiles Clear Stamp and Die Set Feb/2025
- Petite Bows – 3D Embossing Folder Feb/2025
- Scallop Journal Cards Circles Dies
- Everlasting Circles Dies
- Spectrum AB Color Essential Gems
This card is texture heaven. 3 layers of die cuts over an embossed background. It reminds me of wallpaper we had in the kitchen when I was a kid.
Start with the same white card base as above.
Next, die cut a card front from Beeswax card stock and emboss with the 3D Embossing Folder of the month: Petite Bows and attach it to the card base.
Then, die cut the 3 flower dies from the Small Die of the Month kit, Step Into Spring. Sprinkle them generously over the card front and glue them down.
Finally, layer the yellow circle die cut over the white scalloped die cut and add 3 die cut white daisies including the stems and leaves. Add a sentiment stamped using the Spring Smiles Clear Stamp and Die set.
Embellish with Spectrum A B Color Essentials Gems around the circle.
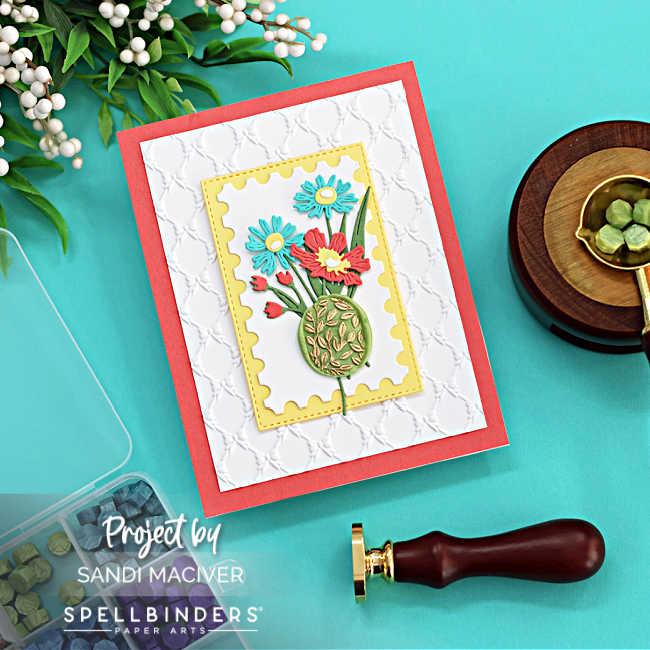
How to Easily Add Texture to Handmade Cards – Card 3, Layered die cuts, embossing and a Wax Seal.
Using layers of different die cuts over embossing can add beautiful texture to your cards. Embellishing with a wax seal adds the “touch” factor. You just have to touch it.
Products Used:
- Lush Leaf – Wax Seal of the Month Feb/2025
- Petite Bows 3D embossing folder Feb/2025
- Nested Postage Labels and tags dies
- Step Into Spring, Small Die of the Month
Start with the same card base, then add a 4-1/4″ x 5-1/2″ card front in Dahlia.
Next, use the Petite Bows 3D embossing Folder to emboss a white panel 3-3/4″ x 5″ and attach to the card front.
Then, use the Nested Postage Labels and Tags Die set to cut out the stitched background panel in Beeswax, then the postage stamp piece in white. Layer these two together and add foam tape to the back before attaching them to the card base. This not only adds interest to the center of your card, it frames and highlights the art pieces.
Finally, die cut more of the flowers from the Step Into Spring Small Die of the month set, and attach them with foam squares. I used Waterfall, Fern, Beeswax and Dahlia card stock for this.
Embellish with a wax seal created with this months Lush Leaf Seal. Once the wax has cooled, color the leaves with the Gold Pen to make them pop.
Visit my Card Making PDF Gallery for 350+ more card ideas.

Card Making Supplies used for the How to Easily Add Texture to Handmade Cards cards:
Here are the products I used today. Compensated affiliate links used were available at no cost to you.
Clicking on a thumbnail link and shopping provides me with a small commission (at no additional cost to you), which supports my website and allows me to continue bringing you new projects and videos. Thank you for your support. Affiliate and product disclosures are found on my disclosure page. All products were personally purchased except for Spellbinders monthly club kits which were provided/sponsored by the company. As always, I was not paid to do this post. I only use and recommend products I love. Click on the icons below each product picture to go to my favorite stores.


-
-
- Follow me on INSTAGRAM
- Join 38,000+ following me on PINTEREST
- Subscribe to my YOUTUBE Channel
- Follow me on FACEBOOK
- Follow my SOURDOUGH BREAD JOURNEY – over on my The Sour Strawberry BLOG
- JOIN my STAMP OBSESSION Facebook Group
- Check out my FREE PDF Gallery for over 350+ Card Making Tutorials
- How to make a SLIMLINE CARD – Info PAGE
- Do you like to stitch on cards? Then join our NEW FACEBOOK GROUP
-

– LOTS of great Paper Crafting Sales and New Releases going on this week – Check them out here
 Shop my Favorite Brands with my affiliate links
If you do place an order using my affiliate links (and thank you if you do) – please email me with the $$ amount before tax and shipping, and which company it was placed through, along with your mailing address and I’ll send you a hand made card as my thank you. [email protected]
The reason I ask for that specific info is the system that tracks the sales only gives us a dollar amount and company name, we do not know who made the sale.
Awesome spring cards! Love the floral die cuts and the framing around the little chicks is perfect! 🙂
thanks so much Amy
Terrific Spring cards! The embossing really makes a difference
on all of them!
thank you Graham
Beautiful Sandi! Arent embossing folders amazing for adding textures. Your three Spring cards are absolutely adorable – but that little chick one with the flowers has my heart! So lovely!
Love the spring feeling!!!!!! The yellow background is gorgeous
thanks so much Natasha