
Hi, card-making friends. Yesterday, Spellbinders released a pile of new products, which you can view here. Today, I’m sharing four projects created with the NEW Spellbinders Mini Wax Seals. I have also combined them with some of the March 2025 Club Kits. These adorable Mini Wax Seals have 4 different images, Heart, Flower, Bow and Butterfly and I have added one to each of today’s projects.
Affiliate links are used throughout this post at no additional cost to you. This allows me to keep bringing you content. I appreciate your support.
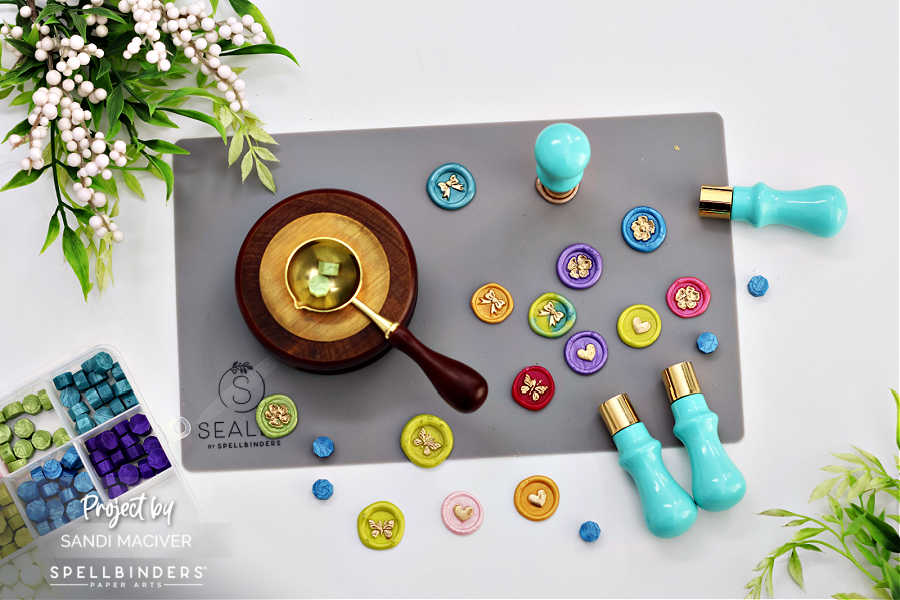
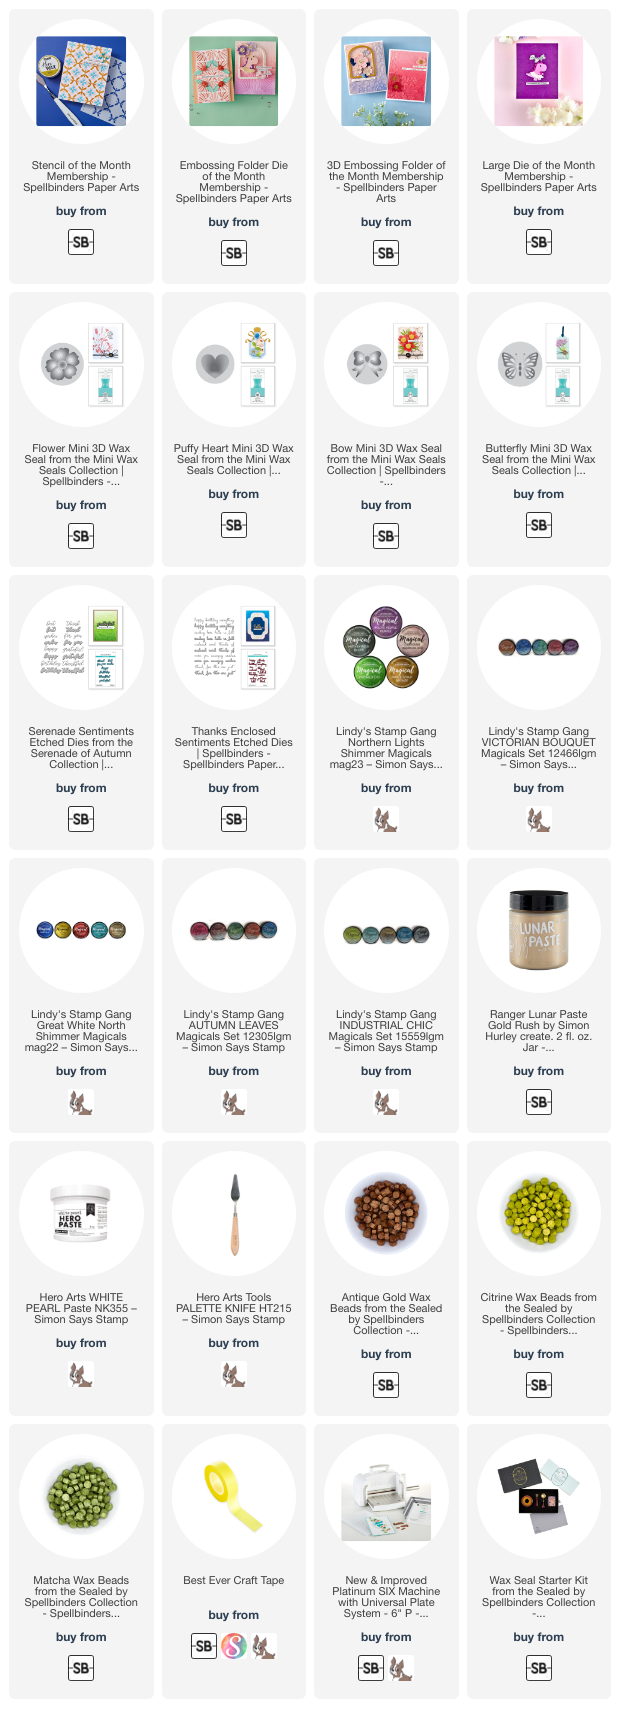
To create these mini seals you only need 2 wax beads. Using three makes the outside edge extremely large and to me, it seems out of proportion to the rest of the image. See the green butterfly seal right under the handle. Using one less bead, also makes them a little easier to mail.
Spellbinders Mini Wax Seals and Stencil of the Month.
Products Used:
- Mini Wax Seal – Butterfly
- Mini Wax Seal – Puffy Heart
- Mini Wax Seal – Flower
- Mini Wax Seal – Bow
- Mosaic and Quilted Memories Stencils of the Month – March 2025
- Family and Friends Vignettes – Large Die of the Month – March 2025
- Serenade Sentiments
- Thanks Enclosed Sentiments – currently on sale for $15.00.
- Mosaic Memories Embossing Folder
- Floral and Fence of Togetherness 3D Embossing Folder
Lindy’s Magical Powders – Listed below in the thumbnails.
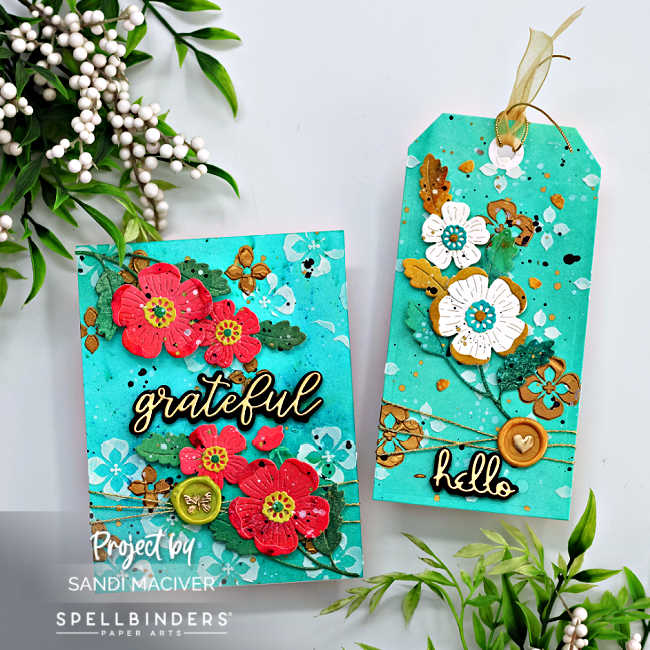
Start by creating sheets of colored watercolor paper using Lindy’s Magicals. Cut a card front 4-1/4″ x 5-1/2″ and use the Tim Holtz Tag Collection dies to cut the large tag.
Next place both on a protected surface and using the Mosaic and Quilted Memories Stencils, stencil White Hero Paste onto them. When the paste is dry, switch the stencils and add Gold Rush Lunar Paste. Set both aside to dry.
Next, using the Family and Friends Vignettes floral dies from the Large Die of the Month Club for March, die cut the flowers and leaves gluing all the pieces together and adding foam squares to the back.
Then, using the Spellbinders Wax Seal Kit, create the mini seals. also, using Serenade Sentiments and Thanks enclosed Sentiments, die cut sentiments for each with scraps of Gold and Black cardstock.
Finally, wrap gold cord around the bases before attaching the florals and the seals. place into a splat box and splatter them with black, white and gold paint.
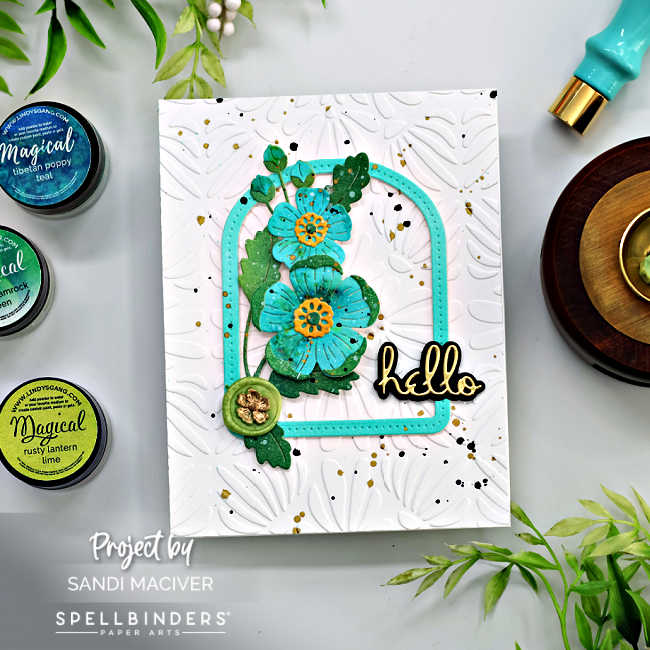
Spellbinders Mini Wax Seals – Project #3
Start by cutting a white card front 4-1/4″ x 5-1/2″ and emboss with the Mosaic Memories Embossing Folder before attaching it to a top folding A2 sized white card base, 4-1/4″ x 11″, score and fold at 5-1/2″.
Next, die cut the frame and florals using the March 2025 Large Die of the Month Club Kit – Family and Friends Vignettes. Also cut the sentiment in black and white using the Thanks Enclosed Sentiment Dies.
PRO-TIP – I cut the frame once from the teal watercolor paper and twice more from white cardstock. Stacking these creates dimension to the frame as it’s too narrow to add foam tape.
Then, create a green wax seal using the flower Mini Wax Seal.
Finally, attach all the embellishments to the card front, using foam squares and liquid glue.
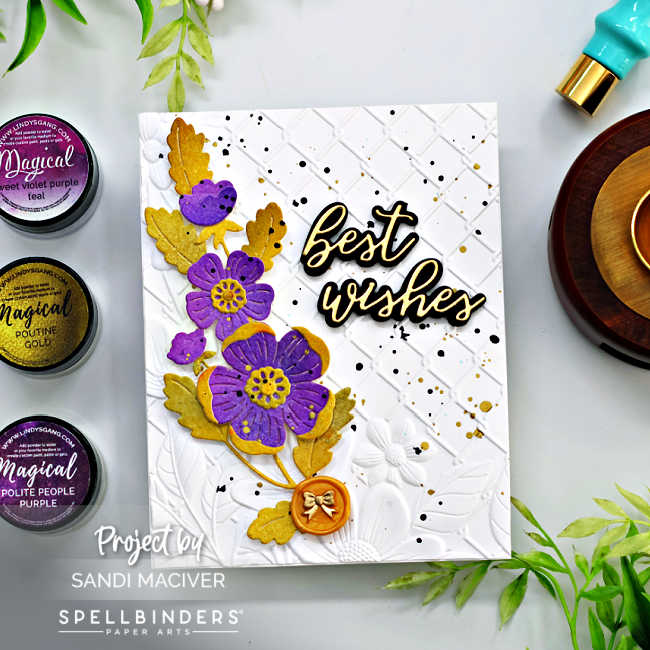
Spellbinders Mini Wax Seals – Project #4
Basically the instructions for this card are the same as #3 with the exception of the embossing Folder.
I used the beautiful Floral and Fence of togetherness 3D Embossing Folder for this one. I can’t get enough of this folder, it is so beautiful.

You can view another card I made with it here:
Visit my Card Making PDF Gallery for 350+ more card ideas.

Card Making Supplies used for the Spellbinders Mini Wax Seal Cards:
Here are the products I used today. Compensated affiliate links used were available at no cost to you.
Clicking on a thumbnail link and shopping provides me with a small commission (at no additional cost to you), which supports my website and allows me to continue bringing you new projects and videos. Thank you for your support. Affiliate and product disclosures are found on my disclosure page. All products were personally purchased except for Spellbinders Mini Wax Seals and Monthly Club products which were provided/sponsored by the company. As always, I was not paid to do this post. I only use and recommend products I love. Click on the icons below each product picture to go to my favorite stores.


-
-
- Follow me on INSTAGRAM
- Join 38,000+ following me on PINTEREST
- Subscribe to my YOUTUBE Channel
- Follow me on FACEBOOK
- Amazon Store
- Follow my SOURDOUGH BREAD JOURNEY – over on my The Sour Strawberry BLOG
- JOIN my STAMP OBSESSION Facebook Group
- Check out my FREE PDF Gallery for over 350+ Card Making Tutorials
- How to make a SLIMLINE CARD – Info PAGE
- Do you like to stitch on cards? Then join our NEW FACEBOOK GROUP
-

– LOTS of great Paper Crafting Sales and New Releases going on this week – Check them out here
 Shop my Favorite Brands with my affiliate links
If you do place an order using my affiliate links (and thank you if you do) – please email me with the $$ amount before tax and shipping, and which company it was placed through, along with your mailing address and I’ll send you a hand made card as my thank you. [email protected]
The reason I ask for that specific info is the system that tracks the sales only gives us a dollar amount and company name, we do not know who made the sale.
Such beautiful projects Sandi! Love the vintage look and the floral pieces are amazing!!
thank you amy
These are fabulous Sandi and it’s nice to see the mini wax seals in action (thanks for the tip regarding using 2 beads!) – I have some here to use so will bear that in mind. I love how you used the stencils with white and gold pastes and gave them a mixed media look. The cards are all beautifully done!
thanks so much Lisa, it was time to change it up a bit, haha
They are pretty and make a super finishing touch
Thanks so much Sharon
Wow! These are ABSOLUTELY gorgeous
thank you my friend
Love your style! Did you see I messaged you on facebook to let you know you are a winner on the Altenew site for a gift card? Don’t want you to miss out.
thank you Kathy. No I missed that, thanks for letting me know.