
Hey card-making friends. I have a new video to share today, Spellbinders Cardstock Swatching and Storage. I’ve had lots of questions about the dies and how to put them together after my blog post last week, so I turned on the video camera and went through the steps for you. Then, I share how I like to store my cardstock. I don’t have a lot of room to spread out in my studio, so I’m always looking for the most efficient and effective way to store my cardstock and scraps, and this method has been working super well for me.
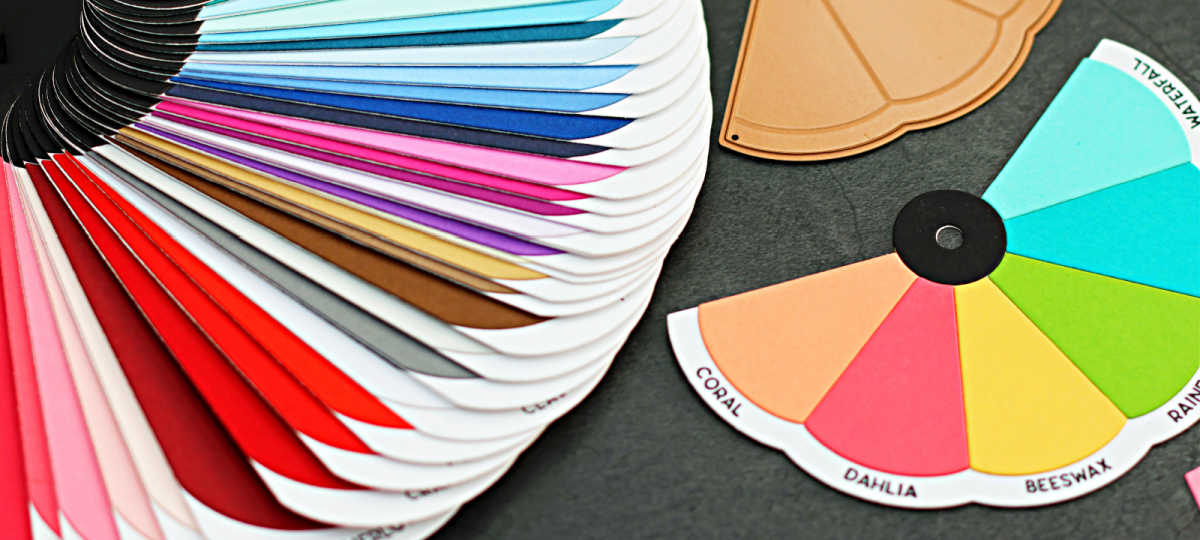
Creating the swatch petals also allows me to see all my cardstock colors and choose the color palette for my cards without pulling out all my cardstock.
Affiliate links are used throughout this post at no additional cost to you. This allows me to keep bringing you content. I appreciate your support.
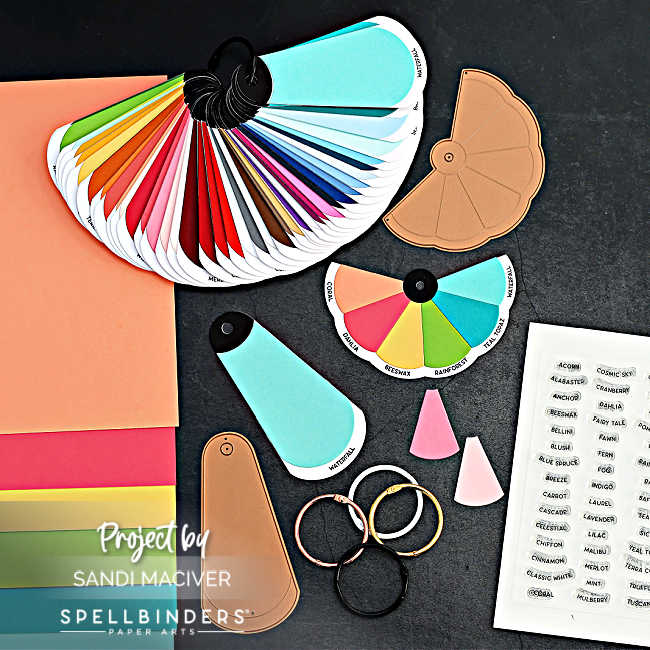
In the video I walk you through how to cut and glue together the petals and the color swatch wheel, as well as how to stamp the cardstock names.
I didn’t have the Color Swatch Wheel finished in the video, because I wanted to show you how it goes together, so here are 3 pictures showing you how you can stamp all the cardstock names at the same time using your Misti.
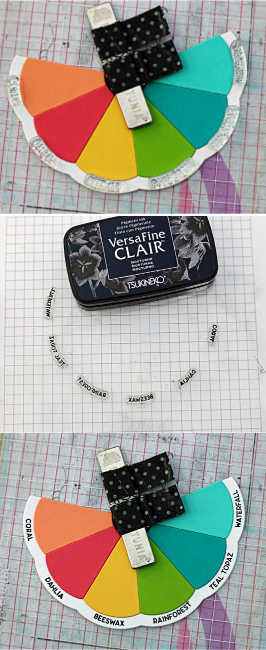
Spellbinders Cardstock Swatching and Storage – Stamping 6 cardstock names at once.
1 – secure the Color Swatch Wheel on the Misti with a magnet.
2 – Lay down all the color stamps. Close the Misti lid, then open it again and ink up the stamps with VersaFine Clair Nocturn ink.
3 – Close the lid and lightly press on each name to transfer the ink.
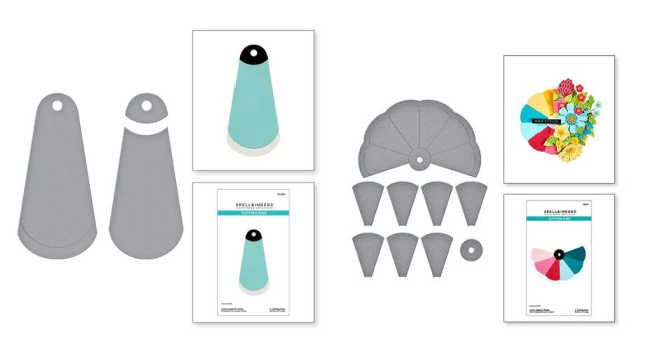
The two die sets I’m using are Left – The Color Swatch Petal Etched Dies and Right – the Color Swatch Wheel Etched Dies.
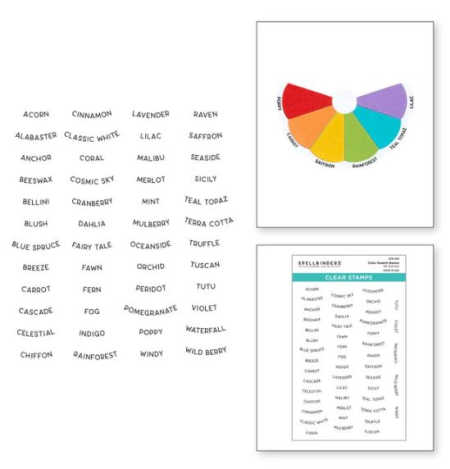
and the Color Swatch Names Clear Stamp Set is a separate item
Here’s today’s video Spellbinders Cardstock Swatching and Storage
– walking you through not only the swatching process, but how I package and store my Cardstock.
As promised in the video, here is an image of behind my chair at my worktable, where I store my cardstock. I have a wall of the white cubes from Michaels, and I store my cardstock on end inside the paper cubes.
The SHOP TICKET HOLDERS I use are from Amazon and you can see them here in my Amazon Store, however, I have also linked some you get get from Simon Says Stamp and Scrapbook.com

Visit my Card Making PDF Gallery for 350+ more card ideas.

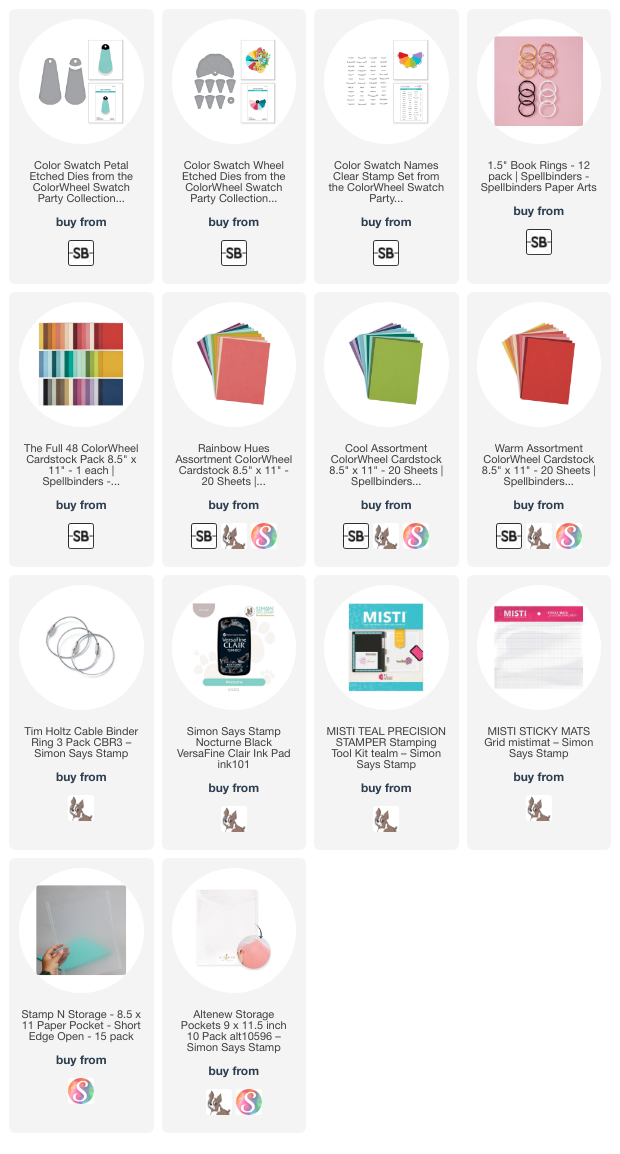
Card Making Supplies used for the Spellbinders Cardstock Swatching and Storage :
Here are the products I used today. Compensated affiliate links used were available at no cost to you.
Clicking on a thumbnail link and shopping provides me with a small commission (at no additional cost to you), which supports my website and allows me to continue bringing you new projects and videos. Thank you for your support. Affiliate and product disclosures are found on my disclosure page. All products were personally purchased except for Spellbinders Color Swatching dies and book rings which were provided/sponsored by the company. As always, I was not paid to do this post. I only use and recommend products I love. Click on the icons below each product picture to go to my favorite stores.


-
-
- Follow me on INSTAGRAM
- Join 38,000+ following me on PINTEREST
- Subscribe to my YOUTUBE Channel
- Follow me on FACEBOOK
- Follow my SOURDOUGH BREAD JOURNEY – over on my The Sour Strawberry BLOG
- JOIN my STAMP OBSESSION Facebook Group
- Check out my FREE PDF Gallery for over 350+ Card Making Tutorials
- How to make a SLIMLINE CARD – Info PAGE
- Do you like to stitch on cards? Then join our NEW FACEBOOK GROUP
-

– LOTS of great Paper Crafting Sales and New Releases going on this week – Check them out here
 Shop my Favorite Brands with my affiliate links
If you do place an order using my affiliate links (and thank you if you do) – please email me with the $$ amount before tax and shipping, and which company it was placed through, along with your mailing address and I’ll send you a hand made card as my thank you. [email protected]
The reason I ask for that specific info is the system that tracks the sales only gives us a dollar amount and company name, we do not know who made the sale.
I just got these! So excited to try these papers!
there are some beautiful new colors and of course some old favorites I am happy they returned
A fiddly project but definitely worth it!!!!
I store my card stock in those cubes too but most
are the other way and definitely need the rearrangement!
yes, it took a bit, but the finished petals are so worth it, it’s so easy to pick colors now without having to haul out all the cardstock
These look amazing Sandi. I got a chance to watch the video too and I really like those thicker plastic pockets you store your card in. I’ll keep those in mind for when I update my storage.