
Hello my card making friends. It’s NEW RELEASE Day and I’ve got two cards for you created with the NEW Simon Says Stamp Bunny Blessings SLIMLINE.
We have a Slimline Card and an A2 sized card just to show you the versatility of this beautiful stamp set.
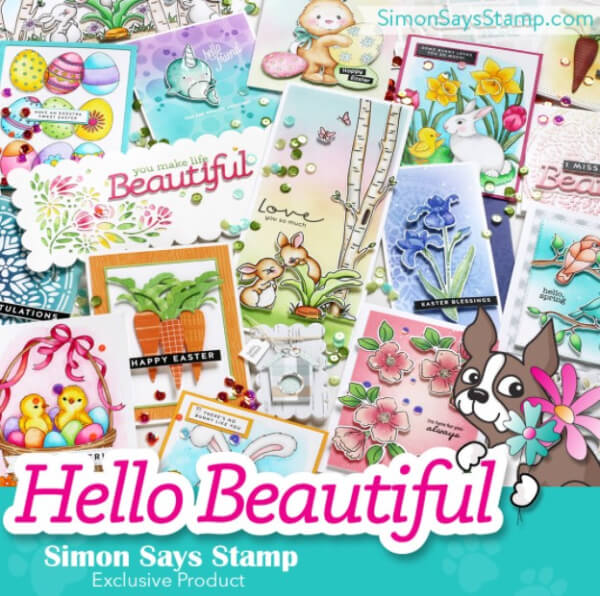
This new release is just fabulous, so many great products to create with. Visit SIMON SAYS STAMP and check them out.
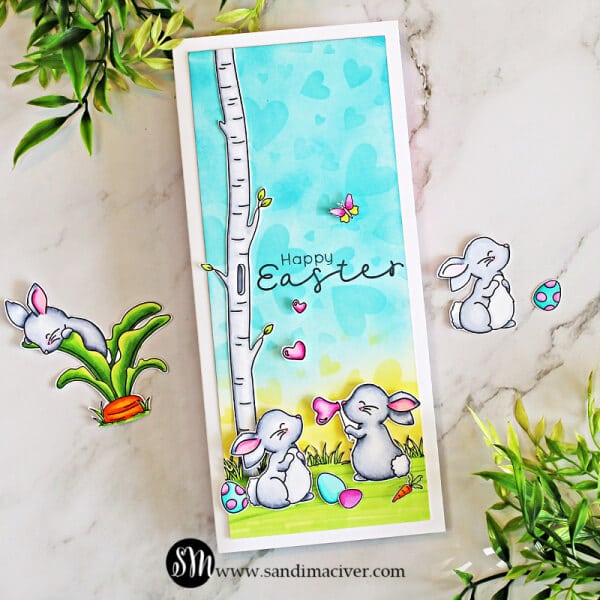
Of course with the tree stamps in this stamp set I had to start with a slimline card.
How to Create the Simon Says Stamp Bunning Blessings Slimline Card:
- Use the Misti to stamp the images onto Hammermill card stock with Copic Friendly Black Ink.
- Color the images with copic markers (listed in the PDF below)
- Cut the background and use blending brushes to add Squeezed Lemonade and Broken China Distress Oxide Inks. Just a light coating
- Cover the background with the Simon Says Stamp Tumbled Hearts stencil and add a second layer of the Distress Oxide Inks.
- Dry fit all the pieces to the background inside the Misti, this allows you to place where you want to stamp your sentiment
- Cut a card base and attach the background
- Add your part pieces with Foam Squares to heighten them slightly
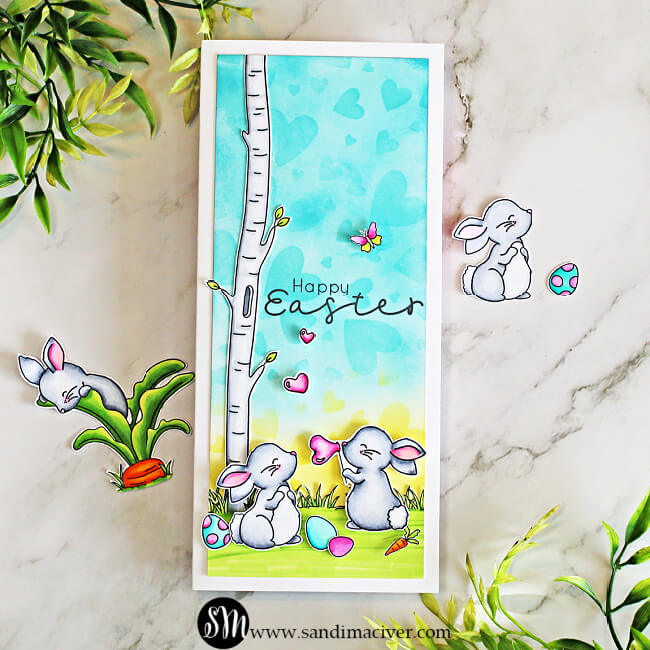
TIP, for the grass, stamp it a little higher, so that you can color down about two inches to create the bottom of the card. Cut the top grass portion, and then attach this piece. Flip it over and trim from the back before attaching to the card base. (I stamped the grass twice for the width).


As the first card was quite involved and took me over an hour to create, I decided to make a clean and simple card for my second one.
Tips to create the Clean and Simple Bunny Blessings Slimline card:
- Start with a 3-7/8 x 5-1/8 background in Hammermill white card.
- Stamp the grass in Copic Friendly black ink
- Use a blending brush to add a thin coat of Mowed Lawn Distress Oxide Ink just to the bottom portion of the card
- Add another piece of Hammermill to the Misti Stamping Tool and stamp the images in Copic friendly ink.
- Color the images with Copic Markers and cut out.
- Attach the card front to a Audrey Blue Mat and then to a side folding A2 card base.
- Foam squares are used to attach the art pieces to pop them up slightly for added interest.

Below you will find a supply list for the cards, under that, clickable thumbnail images of all the new products from this release. Just click on the images to enlarge to view and shop.
Want more info about SLIMLINE CARDS? <<<<<<CLICK – I have a Info page
Visit my PDF Gallery for 250+ more card ideas

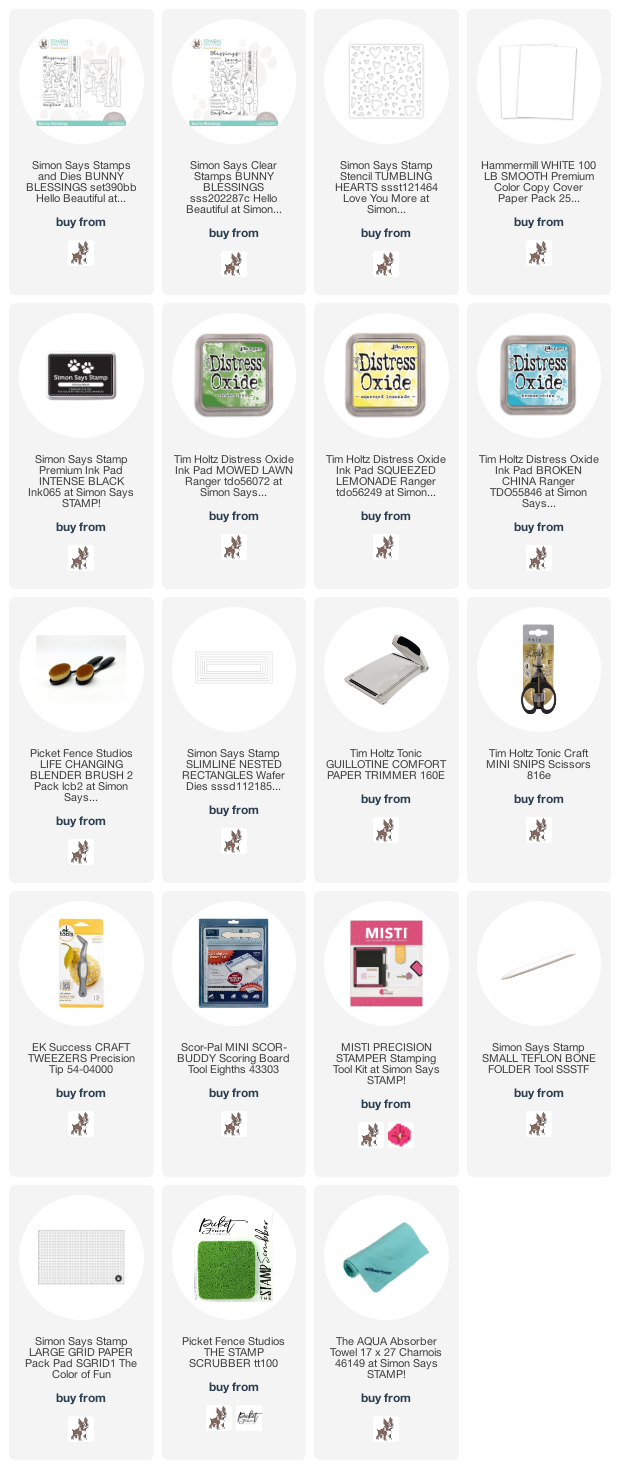
used for the Simon Says Stamp Bunny Blessings Slimline Cards:
Want to find the products I used? I have them listed below. Compensated affiliate links used at no cost to you.
Thank you for your support, it helps to cover my blogging and video expenses.
And here is the list of the Hello Beautiful Release:


-
- Follow me on INSTAGRAM
- Join 37,000+ following me on PINTEREST
- Subscribe to my YOUTUBE Channel
- Follow me on FACEBOOK
- Check out my FREE PDF Gallery for over 200+ Card Tutorials
- How to make a SLIMLINE CARD
The Bunny Blessings cards they are so cute (tellement mignons) the softness and kindness for your choice of coloring and the stories are BEAUTIFUL.. The supplies from Simon is amazing.
Merci, Sandi for sharing your work with all of us.
Yolande
thank you Yolande, it’s a really fun release with lots of springs tones
So sweet! Love the little bunny images, perfect colors! 🙂
thank you Amy
You’ve really shown us the best possibilities with this adorable new set, Sandi! Your designs brought a big smile to my face – come on spring!!
aw thanks Lin, and I couldn’t agree more, COME ON SPRING< haha
I love this set!!!!!!! ADORABLE! I love the slimline!!!!!!!