
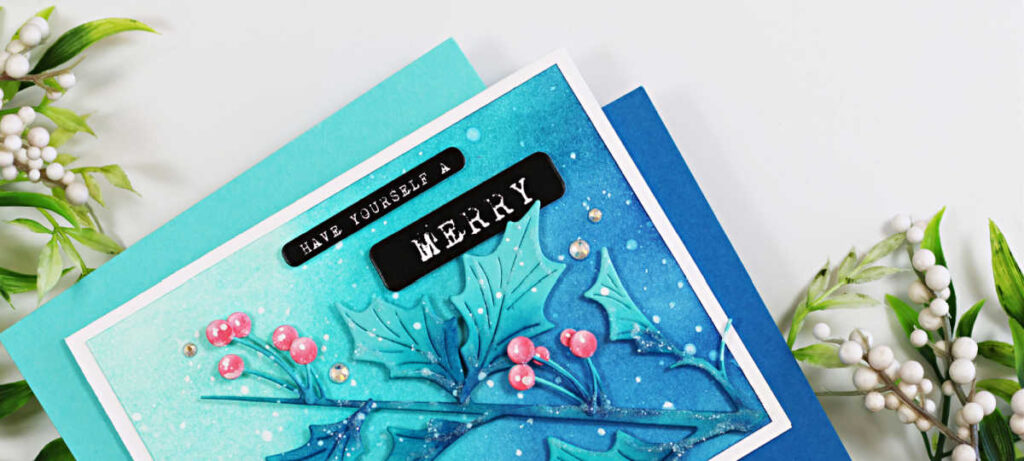
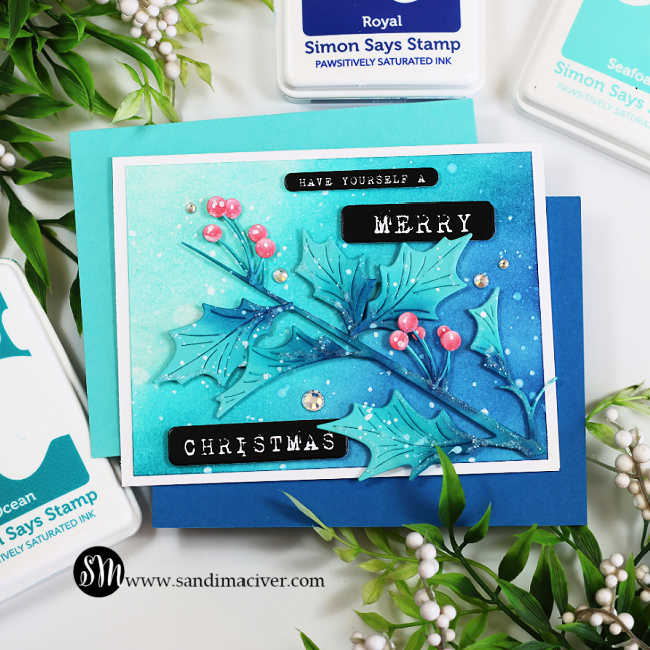
Hey cardmaking friends! I’m popping in today to share my Simon Says Stamp Simple Die Cut Holly Card featuring products from the recent Sugar and Spice Release. This new Christmas card design combines clean die cutting with rich, grungy ink blending for an easy yet eye-catching look. It’s a clean and simple design, perfect for mass-producing holiday cards without sacrificing style.
Card-making product affiliate links are used throughout this post at no additional cost to you. Your support enables me to continue providing you with content, and I genuinely appreciate your support!
Products used for the Simon Says Stamp Simple Die Cut Holly card:
- Narrow Holly Cluster Die Set
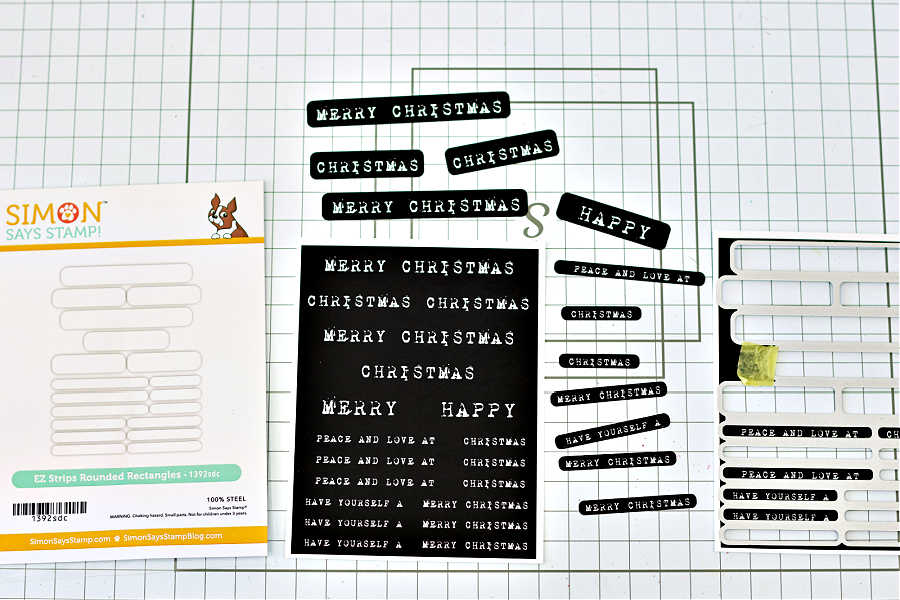
- EZ strips Reverse Vintage Christmas sentiments
- EZ strips Rounded Rectangles sentiment dies
- Rock Candy
- Pawsitively Perfect White Splatter Medium
- Prism Pawsitively Dazzling Gems
How to create the Simon Says Stamp Simple Die Cut Holly Card:

1 – Die Cut the Holly
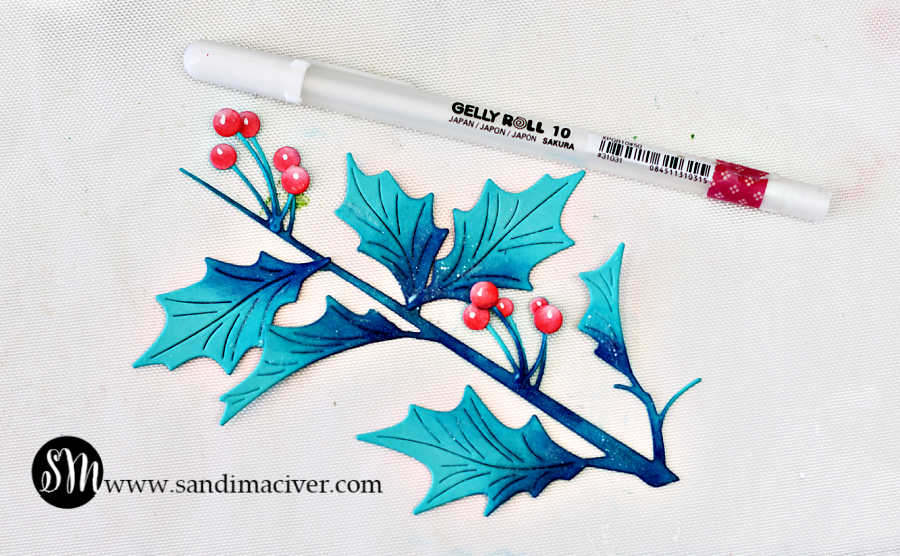
- Start with a 4-1/4″ x 5-1/2″ piece of Audrey Blue cardstock and die cut the Holly cluster along with two extra leaves.
- Next, die cut cut the branch again, this time from Cotton Candy Cardstock, and include the die for the eight additional berries.
- Then, using Ocean and Royal Pawsitively Saturated Inks, blend color onto the leaves to create rich shadows and depth. Then, apply Rhubarb Ink to the lower portions of each pink berry to enhance dimension and realism.
- Finally, layer and adhere the berries, and attach the two extra leaves to the main stem for a fuller, more natural holly branch effect.
#2 – Add Highlights to the Berries
- Use a Sakura Gelly Roll #10 white pen to add small white highlight dots to the tops of the berries for added shine and dimension.
#3 – Ink Blending the Card Front:
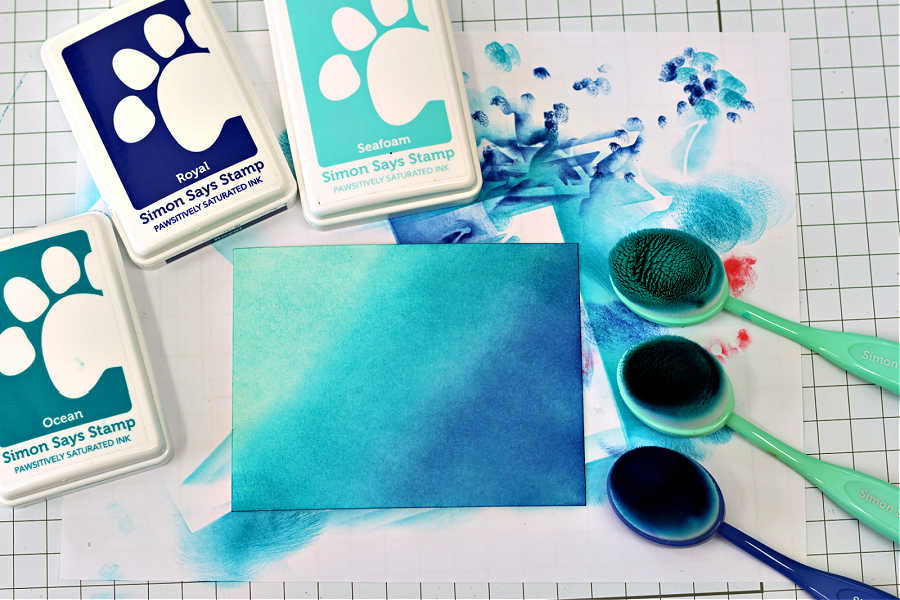
- Cut a piece of watercolor cardstock to 4″ x 5-1/4″, lay it on a protected surface and use large blending brushes to ink blend Pawsitively Saturated Inks in, Ocean, Seafoam and Royal diagonally across the panel. Blend the colors smoothly to create a seamless transition and a soft, luminous background for your card design.
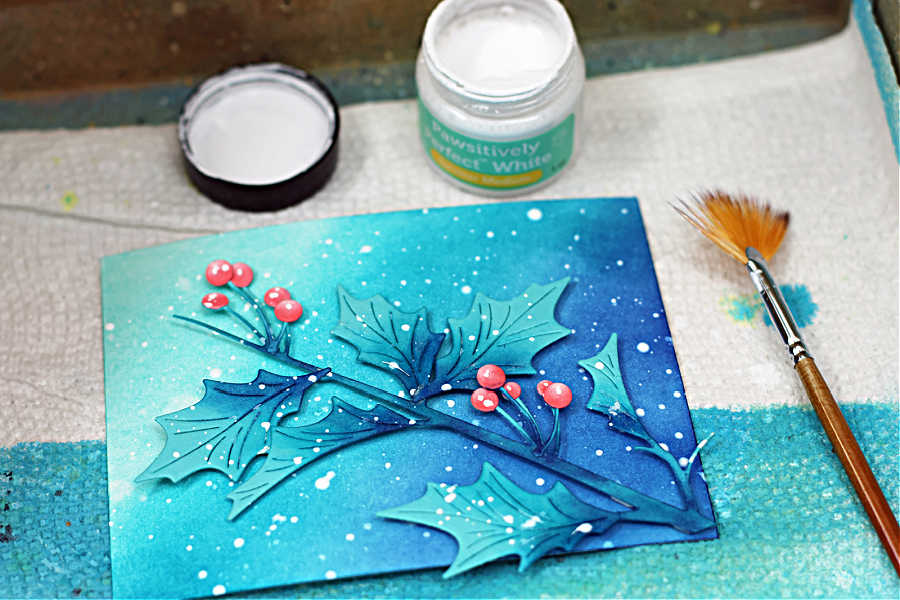
4 – Spritz and Splatter.
- Use foam squares to attach the die-cut holly branch to the ink-blended card front, adding depth and dimension.
- Next, place the panel inside a splat box and lightly spritz with water to create soft, organic watermarks in the background. Then, splatter with Pawsitively Perfect White Splatter Medium, to mimic falling snow and add a festive, wintry effect. Set the piece aside to dry completely before assembling the card.

5 – Embellish
Attach the panel to a top folding A2-sized white card base (5-1/2″ x 8-1/2″, score and fold at 4-1/4″).
Using white glue with a fine tip, add glue to the leaves and berries and then cover with Rock Candy. Shake off the excess and let the glue dry.
5 – Add the Sentiments:
- Use the EZ Strips Rounded Rectangles Die (#1392 SD2) to die cut one of the EZ Strips Reverse Vintage Christmas Sheets. This die is a game changer – it perfectly cuts all the preprinted sentiments at once, saving time and ensuring clean, even edges.
- Next, add foam squares to the back of the chosen sentiment strips and adhere them to the card front, creating a crips, dimensional finish that complements the holiday design.
- Add glimmer and shine with a sprinkle of Prism Pawsitively Dazzling Gems.

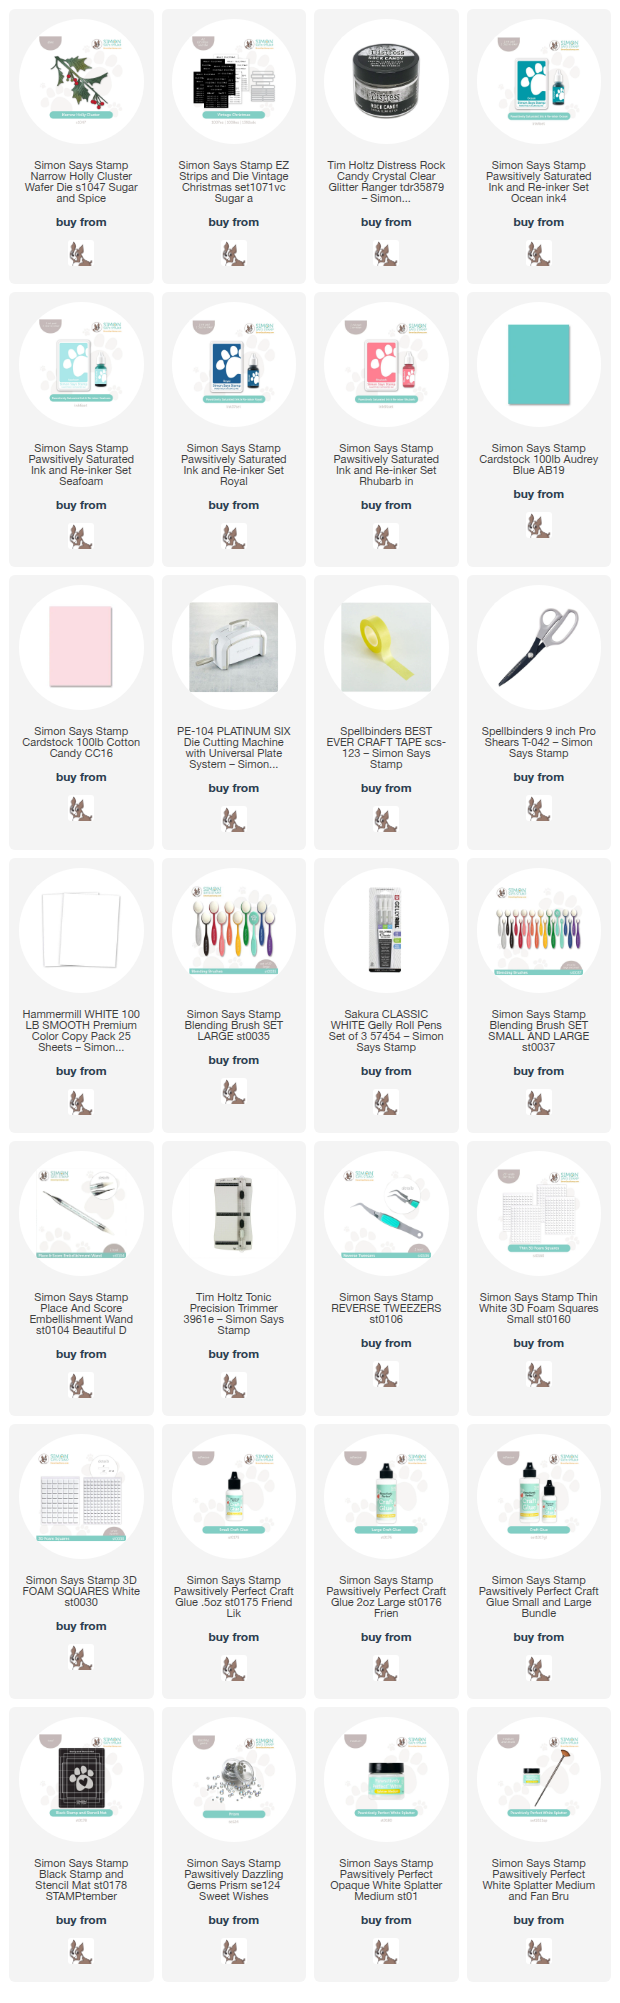
Card Making Supplies used for the Simon Says Simple Die Cut Holly Card:
Here are the products I used today. Compensated affiliate links used were available at no cost to you.
Clicking on a thumbnail link and shopping provides me with a small commission (at no additional cost to you), which supports my website and allows me to continue bringing you new projects and videos. I appreciate your support. Affiliate and product disclosures are found on my disclosure page. All products were personally purchased except for Simon Says Stamp Sugar and Spice Release products, which were provided/sponsored by the company. I only use and recommend products I love. Click on the icons below each product picture to visit my favorite stores.


-
-
- Follow me on INSTAGRAM
- Join 38,800+ following me on PINTEREST
- Subscribe to my YOUTUBE Channel
- Follow me on FACEBOOK
- JOIN my STAMP OBSESSION Facebook Group
- Check out my FREE PDF Gallery for over 350+ Card Making Tutorials
- How to make a SLIMLINE CARD – Info PAGE
- Do you like to stitch on cards? Then join our NEW FACEBOOK GROUP
-

– LOTS of great Paper Crafting Sales and New Releases going on this week – Check them out here
 Shop my Favorite Brands with my affiliate links
Oh my goodness, that’s stunning Sandi! Love the delicate die cuts, perfect colors too! 🙂
thank you Amy
Love this Sandi! The blues give it a wintery look!
thanks so much Sharon
ABSOLUTELY gorgeous
thank you Natasha
love this! its so beautiful!