
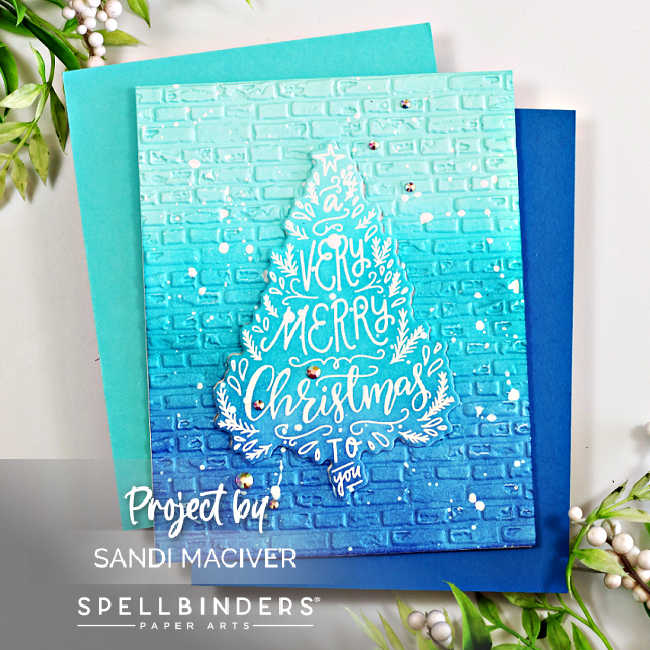
Hi cardmaking friends – welcome back! Today I’m sharing my Spellbinders To You and Yours Holiday Card, created with Spellbinders Clear Stamp and Die of the Month and the 3D Embossing Folder of the Month. This design is quick and easy to make, yet packed with beautiful texture and dimensions. By ink blending a soft blue ombre background before embossing, you’ll create amazing depth and visual interest – all with just two simple layers. I hope this project inspires you to try it out and add a little handmade magic to your holiday cards!

Buy One, Get One FREE – CRAFTY BOGO EVENT
Stock up on your favorite releases!
From Oct 15 – 19 when you purchase one item,
you get another of equal value or less FREE at Spellbinders
No codes required
VISIT SPELLBINDERS – USA
Card-making product affiliate links are used throughout this post at no additional cost to you. Your support enables me to continue providing you with content, and I genuinely appreciate your support!

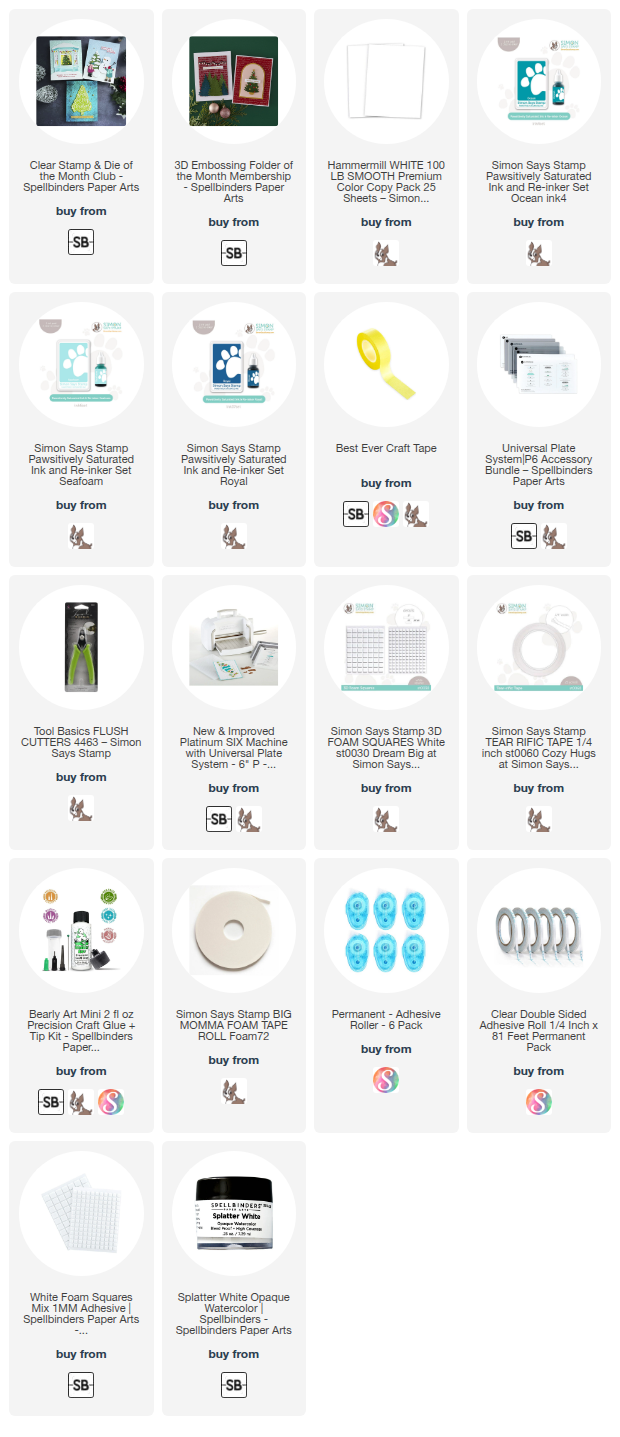
Supplies Used for today’s Spellbinders To You and Yours Holiday Card:
- To You and Yours – Clear Stamp and Die of the Month – October 2025
- Brick by Brick – 3D Embossing Folder Club – October 2025
- Pawsitively Saturated Inks: Seafoam, Ocean and Royal
- White Splatter Paint
Step-by-Step instructions on how to create the Spellbinders To You and Yours Holiday Card:
When I start creating my annual holiday cards, I like to come up with clean and simple ideas that don’t take a lot of time to make – especially since we send out a ton of cards each year! I hope you enjoy this one; it’s super easy to recreate and perfect for beginner card makers looking for a quick and festive project.
1 – Emboss the main image:
Start by white heat embossing the stamped tree image onto a panel of white cardstock measuring4-1/4″ x 5-1/2.
Next, ink blend three shades of blue in an ombre pattern from light to dark. Once the blending is complete, us a dry cloth to gently wipe away any excess ink sitting on top of the embossed areas.
Finally, use the coordinating die to cut out the tree image, creating a clean and dimensional focal point.
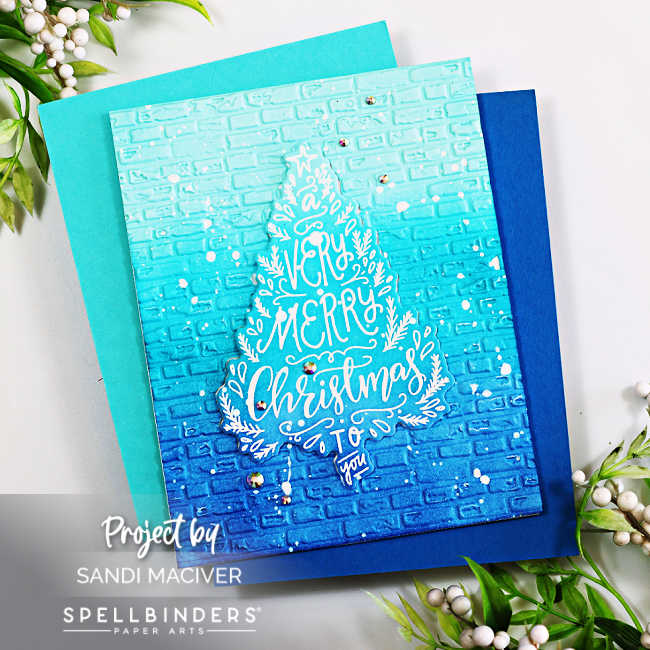
2 – Dry Emboss the Background
Using the negative piece from the tree die cut, place it inside the Brick by Brick 3D embossing folder and run it through your die-cutting machine to create a textured background.
Next, attach the embossed panel to a top folding A2-sized white card base (4-1/4″ x 11″, score and fold at 5-1/2″.
Then, add foam squares to the back of the die-cut tree and position it over the matching cut-out area on the embossed background for added dimension.
Finally, place the card inside a splat box and splatter it with white paint for a snowy effect. Finish by embellishing with Crystal mix Color Essential Gems to add just the right amount of sparkle and festive bling.
Visit my Card Making PDF Gallery for 350+ more card ideas.

Card Making Supplies used for the Simon Says Stamp Lifting hearts card:
Here are the products I used today. Compensated affiliate links used were available at no cost to you.
Clicking on a thumbnail link and shopping provides me with a small commission (at no additional cost to you), which supports my website and allows me to continue bringing you new projects and videos. I appreciate your support. Affiliate and product disclosures are found on my disclosure page. All products were personally purchased except for Spellbinders Monthly Club Kits, which were provided/sponsored by the company. I only use and recommend products I love. Click on the icons below each product picture to visit my favorite stores.


-
-
- Follow me on INSTAGRAM
- Join 38,800+ following me on PINTEREST
- Subscribe to my YOUTUBE Channel
- Follow me on FACEBOOK
- JOIN my STAMP OBSESSION Facebook Group
- Check out my FREE PDF Gallery for over 350+ Card Making Tutorials
- How to make a SLIMLINE CARD – Info PAGE
- Do you like to stitch on cards? Then join our NEW FACEBOOK GROUP
-

– LOTS of great Paper Crafting Sales and New Releases going on this week – Check them out here
 Shop my Favorite Brands with my affiliate links
Stunning! Love all the shades of blue! Is blue the trend for this season?
Thanks Sharon, it seems to be, I’m see a lot of blue
Such a pretty card Sandi! The shades of blue are perfect! 🙂
the blue shades are beautiful, pretty card Sandi