
Hi cardmaking friends, welcome back! This is my second post for today, and I’ve got a ton of inspiration to share with you. The Spellbinders Merry Mischief Gift Tags are absolutely adorable and instead of creating them all the same, I took a deep dive into my die collection and designed four unique and creative tags featuring these charming die-cut critters. They’re perfect for adding a handmade touch to your holiday gift wrapping or as festive accents for your home decor displays.
Let’s take a closer look at each design and explore some fun ways to use this merry collection.
Card-making product affiliate links are used throughout this post at no additional cost to you. Your support enables me to continue providing you with content, and I genuinely appreciate your support!

Products used for the Spellbinders Merry mischief Gift Tags:
- Deck the Paws Die Set
- 5 point stars Infinity Dies.
- Hedge Hugs
- Peppermint Twist BetterPress Plate
- Circle Dies
- Fuchsia Glimmer Hot Foil
- Chimney Caper
- Nested Tags
- Fergus: Winter and Christmas Embellishments (snowflake dies)
- Season Sparkles Embossing Folder
- Silver Mix Color Essential Gems

Spellbinders Merry Mischief Gift Tags #1 – Hedge Hugs on a Peppermint Twist:
I’m starting with my favorite – this adorable little Hedge Hugs tag! With his Harry Potter – style glasses perched on his nose and that Fuchsia Glimmer – Foiled Peppermint Twist background, he’s simply irresistible. Can’t you just picture him sitting on top of a lime green gift box with a big purple ribbon tucked un the Christmas Tree?
How to create the Spellbinders Merry Mischief Gift Tags #1
Step 1 – Die-Cut the Hedgehog
Start by die-cutting all the pieces using the Spellbinders Hedge Hogs die set. I used scraps from my bin in Fawn and Craft cardstock, then added depth and shadows with Distress Oxide Ink in Gathering Twigs.
Step 2 – Add Accessories
Cut the earmuffs, toque, scarf and boots from Peridot and white cardstock. Lightly ink-blend the edges with Evergreen Bough Distress Oxide Ink for extra dimension before assembling.
Pro Tip: For the scarf, I added an overlay of mini Christmas Lights from the Deck the Paws die set – too cute not to use again!
Step 3 – Add Details:
Use a #10 white gel pen to add highlights to the eyes and nose, then glue on the signature Harry Potter glasses. These little touches bring his personality to life and make his face the focal point.
- Creating the Peppermint Twist Tag:
Use Fuchsia Glimmer Hot foil on white cardstock to Glimmer foil the Peppermint Twist BetterPress plate to create the bold, festive background. - Once cooled, die-cut the panel with the second-largest circle die.
- Cut a slightly larger circle from white cardstock to create a clean matte layer.
- Adhere the two layers together, punch a hole in the top, and finish with a snippet of coordinating ribbon.
This cheerful holiday gift tag is bursting with color and whimsy – perfect for dressing up your Christmas gifts or adding a playful accent to your holiday decor!
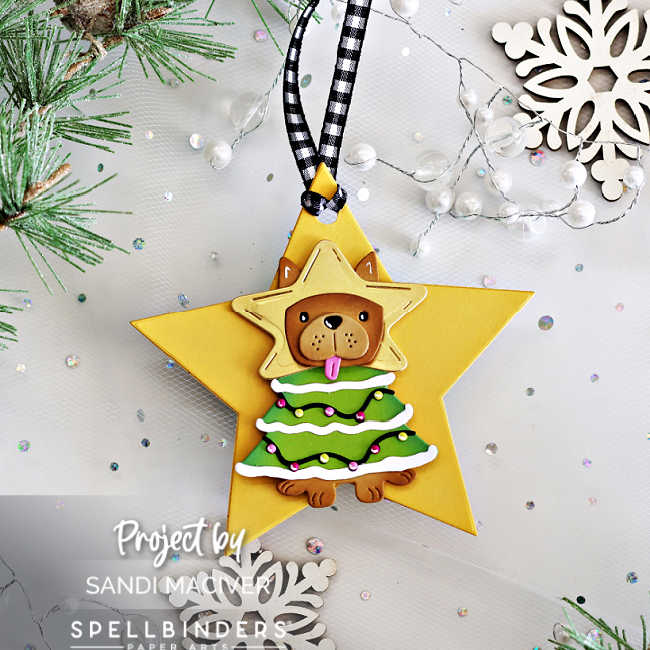
Spellbinders Merry Mischief Gift Tags #2 – Deck the Paws on a Star:
The basic steps for assembling the doggy are the same as the hedgehog above – die-cut, ink-blend for depth, and add highlights for extra character.
Creating the Star Tag:
- Use the Hero Arts 5 Point Stars Infinity Dies and cut two stars from Beeswax cardstock using the largest die.
- Adhere the two stars together for stability, then punch a hole at the top.
- Thread a strip of black and white gingham ribbon through the hole.
- Use foam squares to attach the Deck the Paws Dog to the center of the star for a bit of dimension.
This cheerful star-shaped holiday tag is the perfect finishing touch for your Christmas Gifts or festive decor – playful, bright and full of personality!

Spellbinders Merry Mischief Gift Tags #3 – Hedge Hugs on Embossed Tag:
The basic steps for assembling the hedgehog are the same as the hedgehog #1 above – die-cut, ink-blend for depth, and add highlights for extra character. Spellbinders Mulberry cardstock was used.
Creating the Tag:
- Use the Simon Says Stamp Nested Tags #czd265 and cut two tags with the largest and second largest from Mulberry and white cardstock.
- Emboss the white tag with the Season Sparkles Embossing folder before adhering it to the Mulberry tag.
- Use the snowflake dies from the Fergus the Gnome Winter and Christmas Embellishments to die cut snowflakes. Use one to cover the small hole at the top of the white tag.
- Thread a strip of mulberry ribbon through the hole.
- Use foam squares to attach the hedgehog.
- Add Silver mix Color Essential Gems to the center of each snowflake.

Spellbinders Merry Mischief Gift Tags #4 – Santa in the Chimney Tag:
Use the Chimney Caper die set to create Santa stuck in the chimney, the snow, and the snow on the roof.
Assemble the pieces and then use a #10 gel pen to add highlights to the boots and belt.
Creating the Tag:
- Use the Simon Says Stamp Nested Tags #czd265 and cut a tag from Cosmic Sky dark blue cardstock.
- Place the tag inside a splat box and splatter it with white paint.
- Use the Fergus the Gnome Winter and Christmas Embellishments to die-cut white snowflakes and set aside.
- Use foam squares to adhere the Santa/chimney piece to the tag.
- Stamp the sentiment on the snow piece and then adhere it to the bottom of the tag, also with foam squares.
- Finally, adhere the snowflakes to the background and embellish with a Silver gems in the center of each one.
I hope you enjoyed my collection of holiday tags and they gave you some inspiration to create your own with these adorable critters from the Merry Mischief Collection.

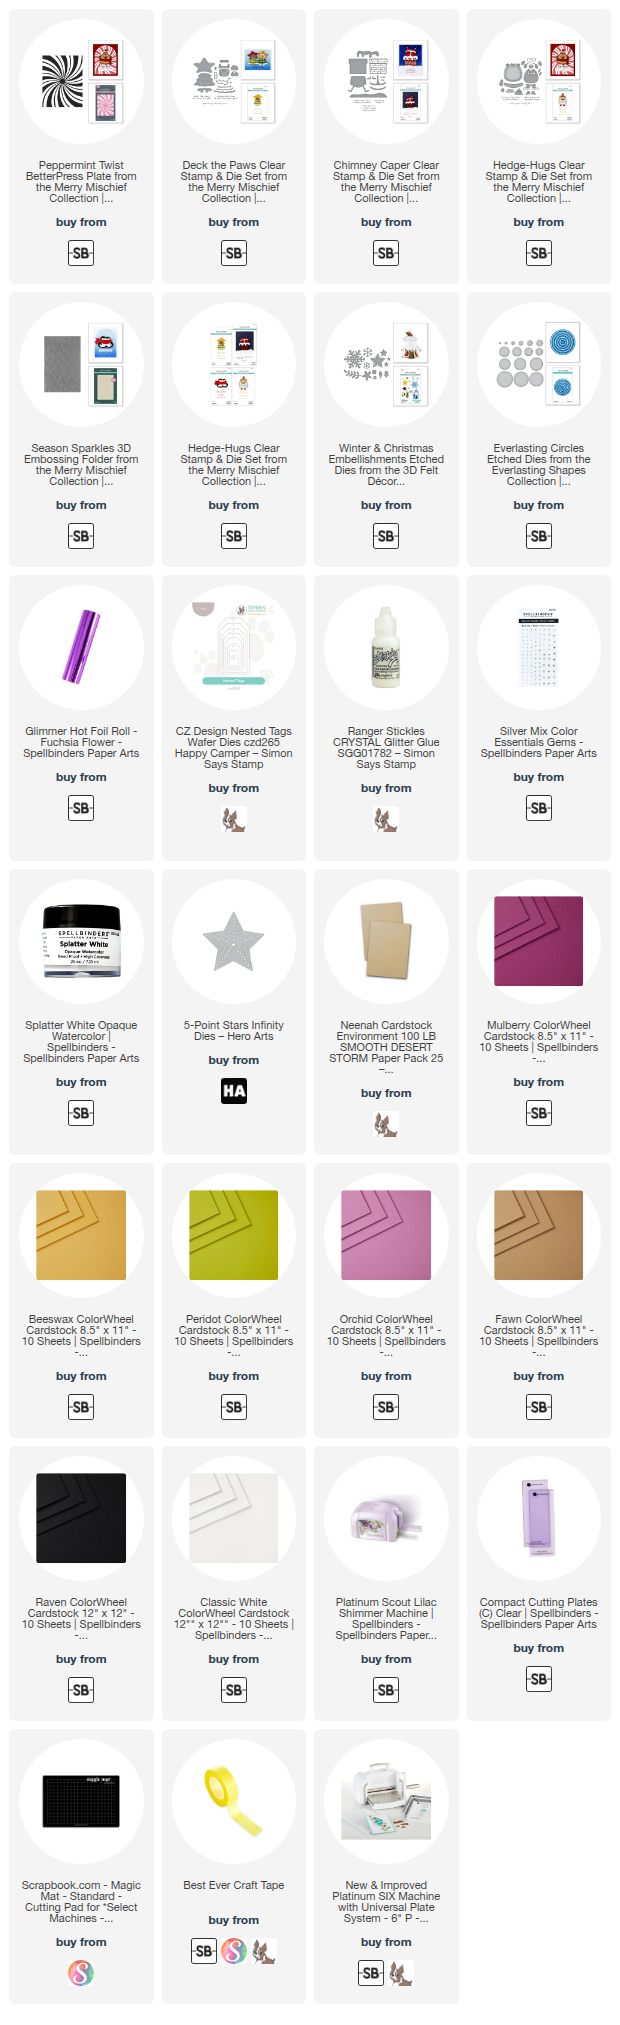
Card Making Supplies used for the Spellbinders Merry Mischief Gift Tags:
Here are the products I used today. Compensated affiliate links used were available at no cost to you.
Clicking on a thumbnail link and shopping provides me with a small commission (at no additional cost to you), which supports my website and allows me to continue bringing you new projects and videos. I appreciate your support. Affiliate and product disclosures are found on my disclosure page. All products were personally purchased except for Spellbinders Merry Mischief product release, which was provided/sponsored by the company. I only use and recommend products I love. Click on the icons below each product picture to visit my favorite stores.


-
-
- Follow me on INSTAGRAM
- Join 38,800+ following me on PINTEREST
- Subscribe to my YOUTUBE Channel
- Follow me on FACEBOOK
- JOIN my STAMP OBSESSION Facebook Group
- Check out my FREE PDF Gallery for over 350+ Card Making Tutorials
- How to make a SLIMLINE CARD – Info PAGE
- Do you like to stitch on cards? Then join our NEW FACEBOOK GROUP
-

– LOTS of great Paper Crafting Sales and New Releases going on this week – Check them out here
 Shop my Favorite Brands with my affiliate links
Those are way too cute! Love them all! 🙂
Well, you certainly outdid yourself with these cute, adorable tags, Sandi!
Oh my heavens, the pup in the christmas tree is my favourite lol but ALL are adorable Sandi!
These are AMAZING!!!!!!
thank you friend