
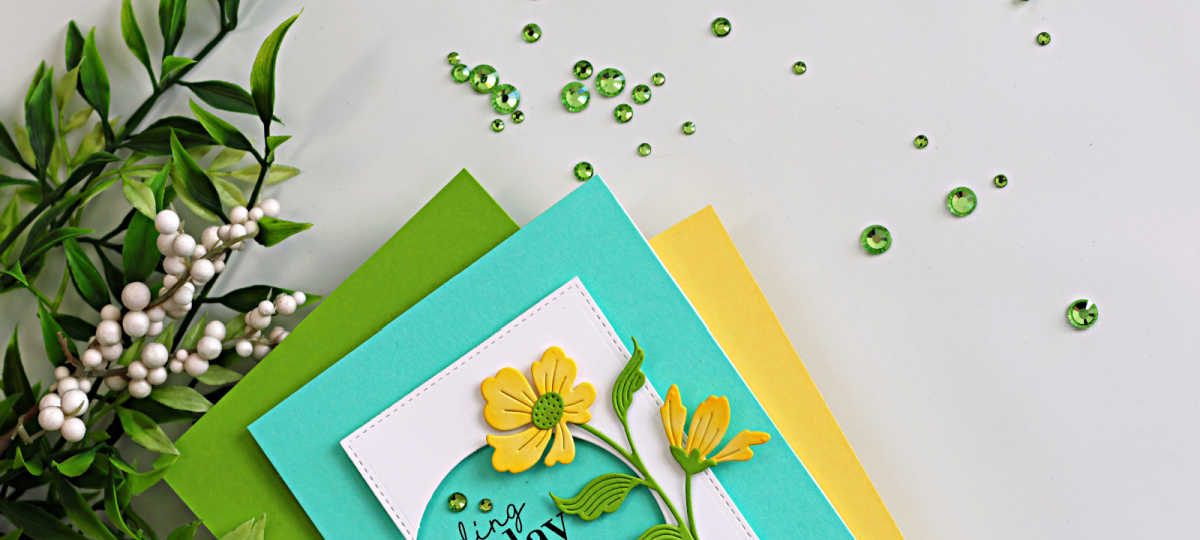
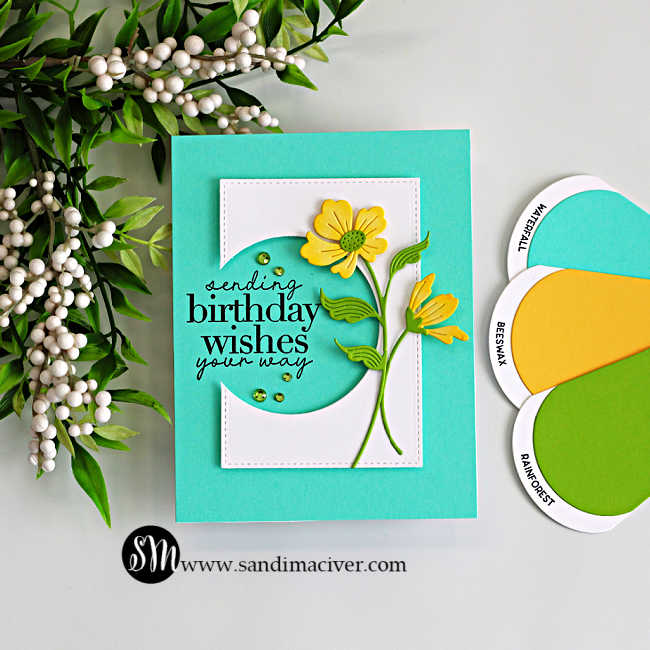
Hi cardmaking friends — welcome back! Today I’m sharing one simple die cut trick that makes your cards POP. Just one die cut can take a basic design and turn it into a total showstopper. It’s honesty one of the easiest ways to add interest to your cards–with just a single cut.
So What is it?
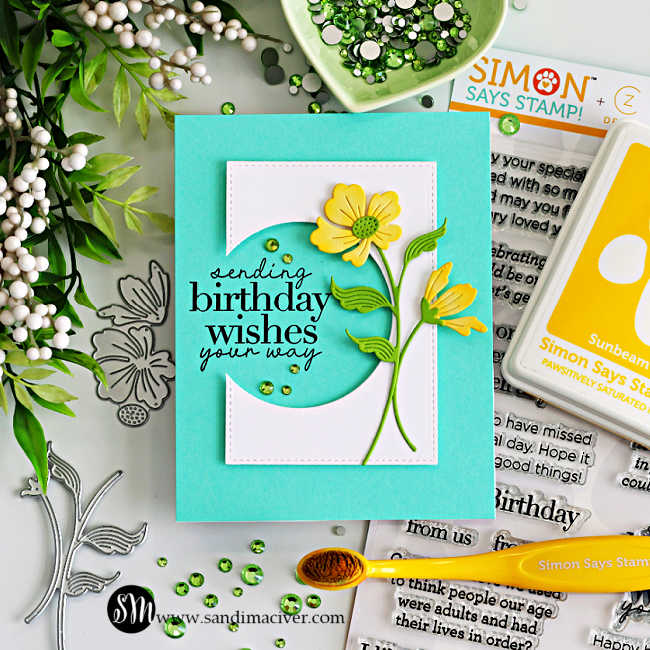
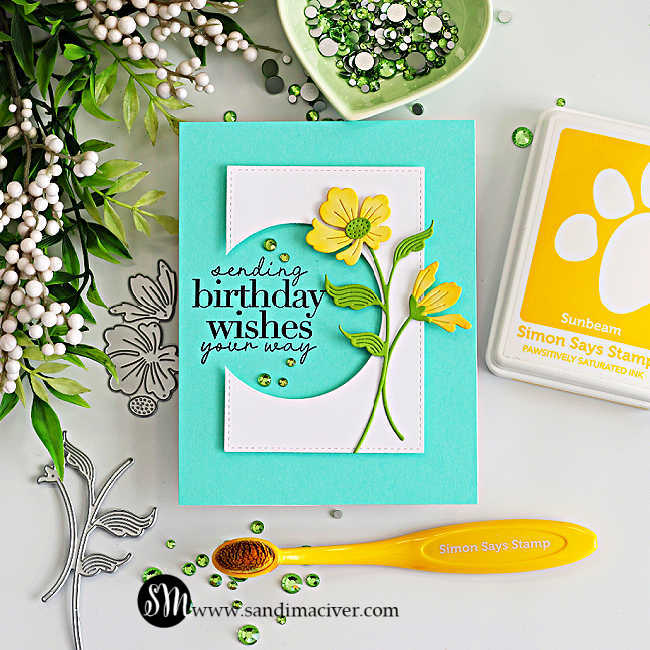
A simple circle die-cut into the card front — the panel you were already planning to use.
And What Does it do?
- Instantly adds visual interest
- Creates a natural frame for your sentiment
- Gives your card that “wow” factor–something a little unexpected that makes you stop and think, “that’s so cool….and so easy!“
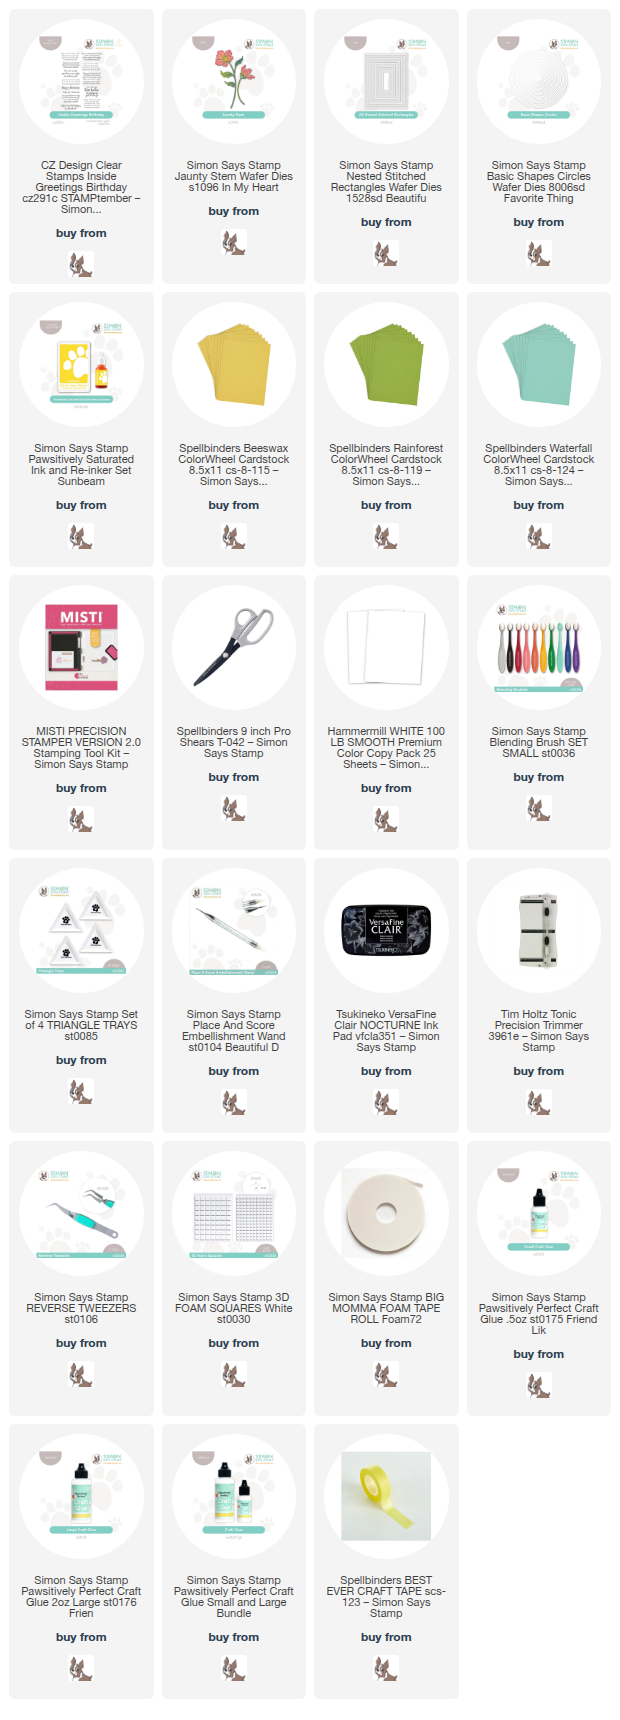
Products used for today’s One Simple Die Cut Circle Card Idea:
- Inside Greetings Birthday Stamp Set
- Jaunty Stem Die Set
- Stitched Rectangles Dies
- Basic Shapes Circles
4 Easy Steps to create the Card:
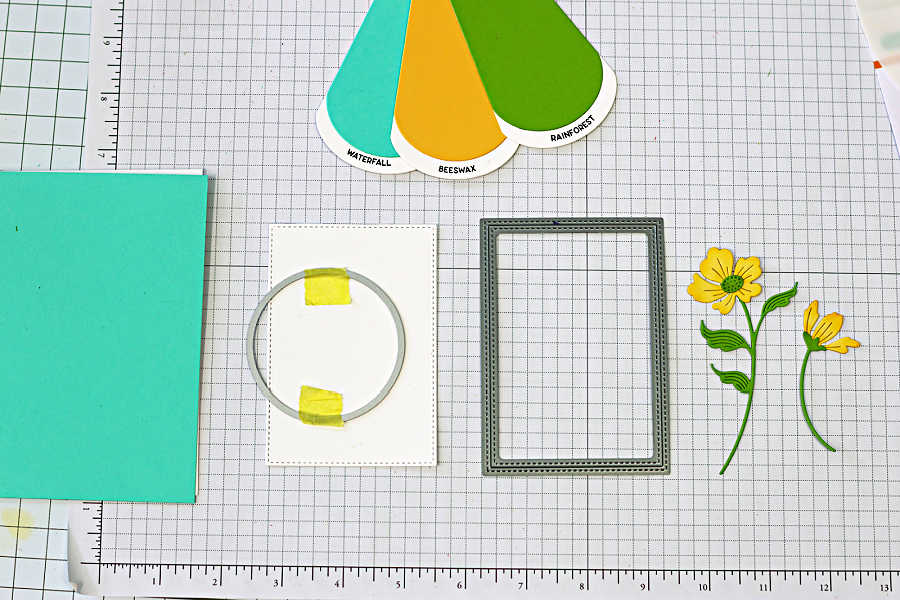
Create the Card base:
Trim Waterfall cardstock to 4-1/4″ x 5-1/2″ and adhere it to a top-folding A2-sized white card base.
Create the Peek-a-Boo Card front:
Trim white cardstock to 4-1/4″ x 5-1/2″, then use a Stitched Rectangles die to cut a smaller panel (approx. 3″ x 4″).
Position a circle die on the left side of the panel to create a window for your sentiment. Secure it and run it through your die cutting machine. Dry fit the circle die cut panel onto the card base.
Stamp the Sentiment:
Place the card inside Your Misti and secure the die cut panel with magnets. Stamp the sentiment inside the circle opening.
PRO-TIP: Stamping with the panel in place ensures perfect alignment and allows you to use a larger sentiment.
Add foam squares to the back of the panel and adhere it to the center of the card front.
Embellish the Card:
Die cut the Jaunty Stem florals from Beeswax and Rainforest cardstock. Ink blend Sunbeam ink onto the edges for added depth, then assemble.
Attach the florals to the right side of the circle die cut panel using foam squares. Finish with sprout Pawsitively Dazzling Gems for a bit of sparkle.
Perfect Color Combos for Cardmaking:
This is another beautiful color combo for cardmaking, featuring Waterfall, Beeswax, and Rainforest cardstock. The soft teal paired with warm yellow and fresh green creates a gentle spring palette that feels both fresh and balanced. Waterfall adds a light, airy base, while Beeswax brings warmth and brightness, and Rainforest grounds the design with natural depth. Together, they blend seamlessly for a soft, harmonious look that’s perfect for florals, yet still provides enough contrast to make your die cuts and sentiments stand out.


Never Miss a Cardmaking Tutorial
Subscribe to my blog and get the latest cardmaking ideas, tutorials, and inspiration delivered straight to your inbox — plus access to exclusive content and updates you won’t want to miss!

Visit my YouTube channel for 270+ cardmaking tutorials, techniques, and creative ideas to inspire your next project
Cardmaking Supplies Used:
Here are the supplies I used to create today’s one simple die cut circle card idea.
Many of the links below are compensated affiliate links. This means if you click through and make a purchase, I may receive a small commission at no additional cost to you.
These commissions help support my website and allow me to continue sharing cardmaking tutorials, videos, and inspiration. I truly appreciate your support.
All products were personally purchased unless otherwise noted. Simon Says Stamp products were provided by the company for design purposes.
You can find my full affiliate disclosure on my disclosure page.
Click the icons below each product to shop my favorite stores.
Let’s Connect & Get Inspired
Follow along for more cardmaking ideas, techniques, and tutorials:
- Follow me on Instagram
- Join 38,800+ creatives on Pinterest
- Subscribe to my YouTube Channel
- Follow me on Facebook
- Join my Cardmaking Obsession Facebook Group
FREE Cardmaking Tutorials Library
Looking for more inspiration? Explore my FREE PDF GALLERY with 359+ cardmaking tutorials — packed with ideas, techniques, and step-by-step projects to spark your creativity.

Don’t Miss This Week’s Deals
Lot’s of great paper crafting sales and new releases happening now — check them out here!

Shop My Favorite Craft Brands
Browse my Go to Brands and supplies using my affiliate links.
Such a pretty card Sandi! Love the framing around the sentiment and delicate flowers! 🙂
thank you Amy
Great tip. Looks like a fun idea and I am going to try it.
Thanks Karen, it’s super simple, but it really makes a statement
You are AMAZING! I learn something almost every time I visit your blog!! Thank you for the ongoing inspiration!!
aw, thank you Judy, and thank you for visiting, I appreciate it
Love this look. Seeing it a lot lately and have got to try it out!
Yes, it’s very popular, and super easy to do
What a brilliant idea! So simple but very impactful! I will definitely try it out. Thank you for the great inspiration!
Thank you Carmen, and you are so welcome. I hope you will try it
Interesting and different!!!
thank you Sharon
What a cool detail that is! It’s something I used to do on odd occasions back in the day when I wasn’t rushing to make something! I love how it frames the sentiment. Great card Sandi!
I know right, it’s fun to go back to some of the older techniques and make them new again