
I have some Spellbinders Cheerful Chirps Hand-Made Cards to share with you. This release goes live today. If you are a Club Member, you had access to the new products on the 6th. It consists of three sets of die-cut birds, foliage, and flowers to create with. The little birds are so much fun to die-cut, ink-blend for shading, and then create a little forest habitat for them to live in. Use the Spread Your Wings Sentiment set to add some fun sentiments.
You can view the entire Cheerful Chirps release from Spellbinders here
Card-making product affiliate links are used throughout this post at no additional cost to you. Your support enables me to continue providing you with content, and I genuinely appreciate your support!

Products used for the Spellbinders Cheerful Chirps Hand-Made Cards:
- Spread Your Wings Sentiments
- Flying High Die Set
- Free Hugs Oscar
- Pretty Birds Etched Die Set
- Essential Arches Die Set

How to create the Spellbinders Cheerful Chirps Hand-Made Card #1.
Once I got the art piece all glued together, I decided I just had to make this one into a shaker card. So here are the step-by-step directions.
To start, die-cut all the pieces for the two birds, three sets of leaves and flowers, and the perch.
I used the Spellbinders cardstock:
Tutu, Waterfall, Teal Topaz, Peridot, and Beeswax. The perch is cut from Mirror bronze cardstock.
Next, use Distress Oxide Inks to ink blend some highlights into the birds, flowers, and foliage to add depth and detail.
Distress Oxide Inks Used:
Mustard Seed, Picked Raspberry, Broken China, Mermaid Lagoon, and Rustic Wilderness.
Then, glue all the pieces together.

How to create the Shaker Card:
Start by picking a card front, mine is Waterfall, 4-1/4″ x 5-1/2″. Use the Essential Arches to cut an arch, the same size as the perch.
Next, flip the card front over, and cut a cello bag slightly larger than the arch cut. Add some white glue around the opening, and attach the cello bag.
Next, use the long foam tape strips and create a bridge around the arch opening. Then, go around the outside edge of the card front with the same foam tape strips. This will ensure the card front stays flat once it is attached to the card base.
Then, place the card face down in the top-left corner of your Scor-Pal or Misti. Use the frame around the top left corner to help you put the card base square on the card front.
Pour in the sequin mix, then remove the protective covers from all the foam tape strips. Use the Scor-Pal frame to guide you in placing the folded A2-sized white card base on top. Press firmly to secure all the tape in place. Turn the card over and glue the art piece and sentiment to the front.
Embellish the art piece with a white gel pen.

How to Create Card #2.
Start by die cutting a circle out of the 4-1/4″ x 5-1/2″ card front. Next, die-cut the round leaf spray from the same color as the card front multiple times until you have enough pieces to cover the card front.

Next, glue all the die cuts down and trim off any excess overhang. Then, attach them to a top-folding, A2-sized white card base.
Then, die-cut all the bird and foliage pieces from colored cardstock. Use the Distress Oxide Inks to ink blend highlights and shadows before gluing them together.

Finally, attach the bird and branch first using foam squares. Next, attach the three bunches of foliage and flowers. Then, embellish with some Peridot Color Essential Gems.

How to Create the Spellbinders Cheerful Chirps Hand-Made Card #3
I called on my inner Andy Warhol for this one. This is Oscar, and I cut him out four times using different color combos from the previous two cards.
Next, mount the Oscars onto a piece of Beeswax cardstock before adding the triple-layered ‘Free Hugs’ sentiment.
Because there was so much going on in this card, I decided not to embellish further. I also tried embossing the card front with the Bamboo Screen Embossing Folder, but it made the card too busy, so I stuck with just the plain background.
Those are my shares for today. Thank you so very much for stopping in. Below is the supply list for the products used in today’s cards.

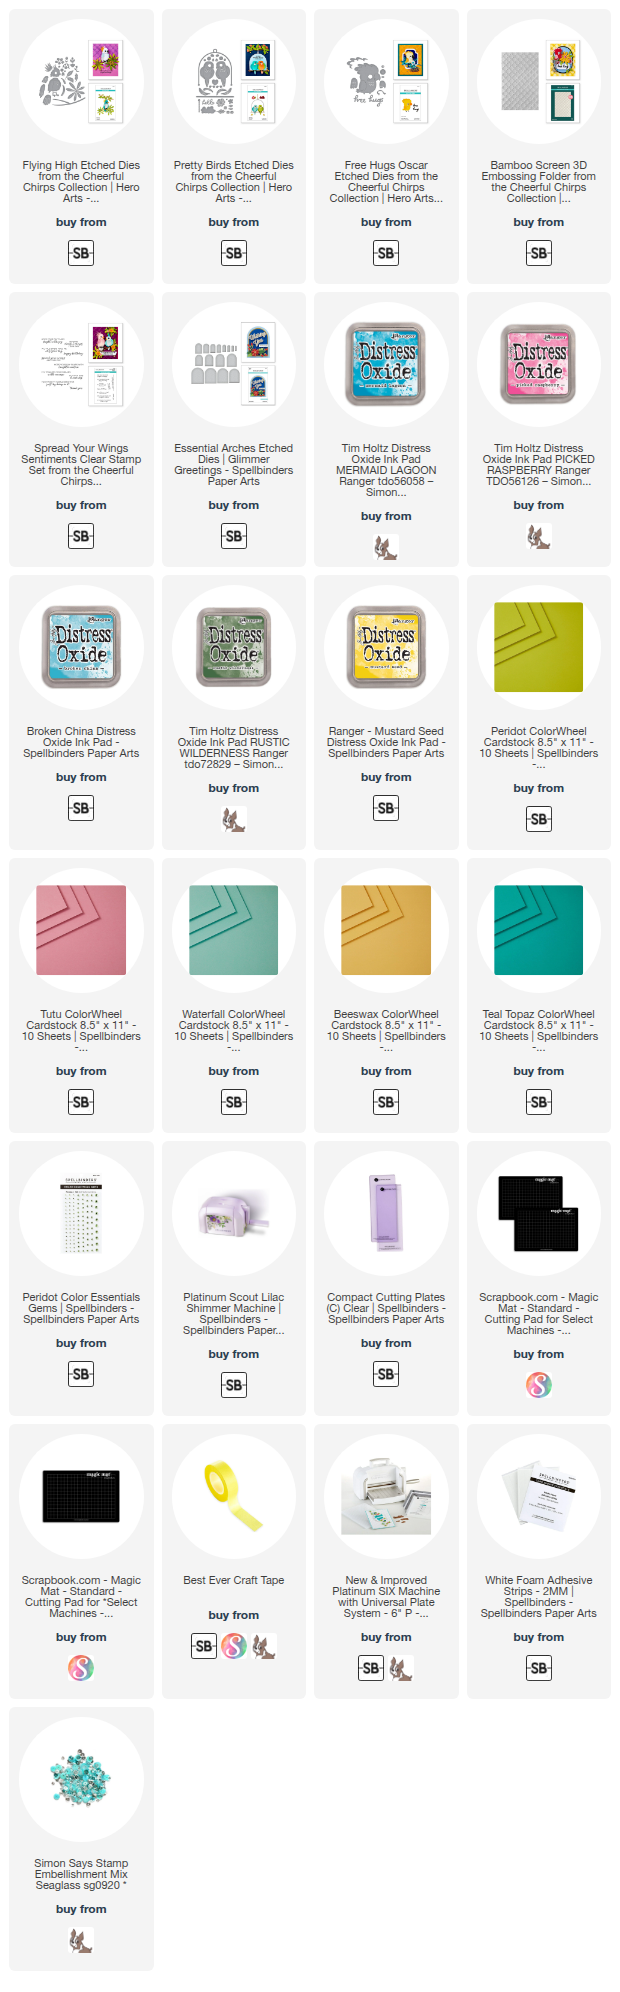
Card Making Supplies used for the Spellbinders Cheerful Chirps Hand-Made Cards:
Here are the products I used today. Compensated affiliate links used were available at no cost to you.
Clicking on a thumbnail link and shopping provides me with a small commission (at no additional cost to you), which supports my website and allows me to continue bringing you new projects and videos. I appreciate your support. Affiliate and product disclosures are found on my disclosure page. All products were personally purchased, except for the Spellbinders Cheerful Chirps release, which was provided or sponsored by the company. I only use and recommend products I love. Click on the icons below each product picture to visit my favorite stores.


-
-
- Follow me on INSTAGRAM
- Join 38,000+ following me on PINTEREST
- Subscribe to my YOUTUBE Channel
- Follow me on FACEBOOK
- Amazon Store
- Follow my SOURDOUGH BREAD JOURNEY – over on my The Sour Strawberry BLOG
- JOIN my STAMP OBSESSION Facebook Group
- Check out my FREE PDF Gallery for over 350+ Card Making Tutorials
- How to make a SLIMLINE CARD – Info PAGE
- Do you like to stitch on cards? Then join our NEW FACEBOOK GROUP
-

– LOTS of great Paper Crafting Sales and New Releases going on this week – Check them out here
 Shop my Favorite Brands with my affiliate links
Such cute cards! Love the shaker card and the bird die cuts are fantastic! 🙂
thanks so much Amy, they were super fun to make
So very cute and colourful! Love your signature colours!
thanks so much Sharon, come on, I added pink on the shaker one, haha
Wow!!!!!! The colors are STUNNING!!!!!
thank you my friend
amazing! i LOVE the shaker, I LOVE the textured background on the second card and I LOVE the grid format of the third card. Bravo!
thank you Lisa, it was a fun afternoon creating these